
Make a classic braised chicken with an enameled dutch oven
An enameled dutch oven is the ideal vessel for braising. The smooth porcelain surface doesn't react with acidic ingredients like tomatoes or wine, and it holds heat evenly without the maintenance of raw cast iron. This recipe uses the pot's heavy lid to trap steam, creating a tender, flavorful dish with minimal hands-on time.
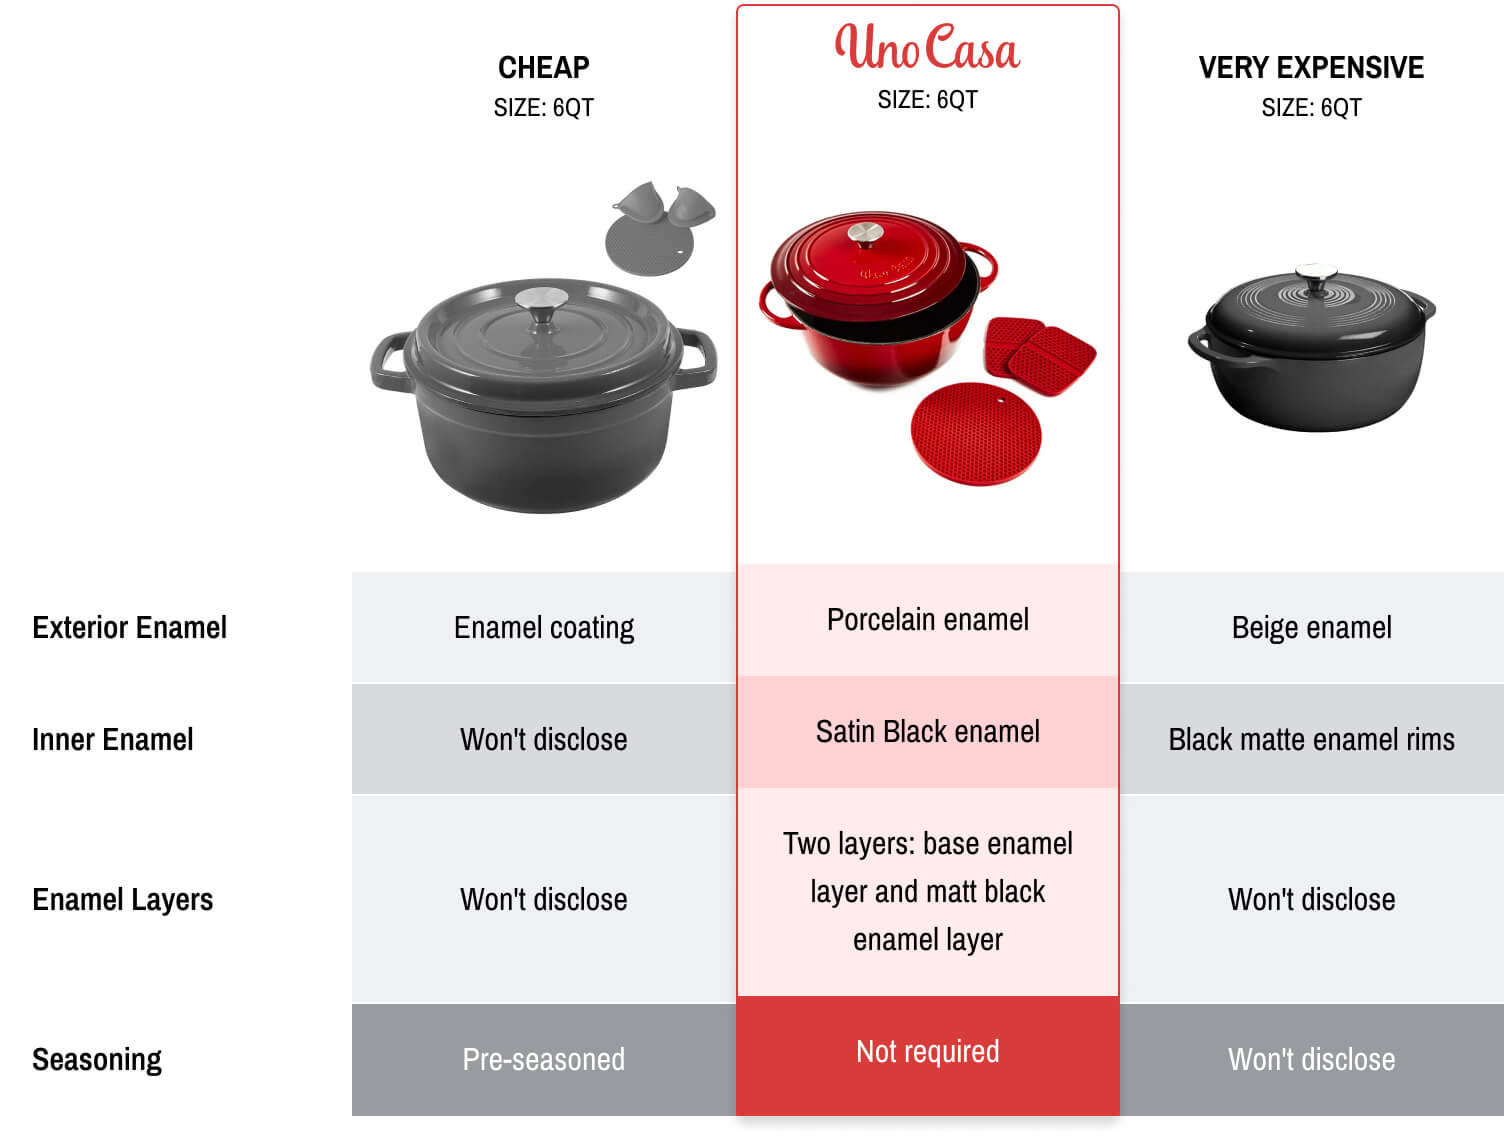
The following steps are optimized for a standard 6-quart enameled dutch oven. If your pot is larger or smaller, adjust the liquid volume slightly to ensure the chicken is mostly submerged.

The key to success here is patience. The enameled surface allows you to deglaze with wine without worrying about stripping a seasoning layer. The tight-fitting lid ensures that moisture stays inside, keeping the meat juicy throughout the long cook. Once done, the pot can go straight from the oven to the table, making cleanup as easy as a warm soak in soapy water.
Keep the Texture Right
The difference between a rich, cohesive braise and a watery, disjointed mess often comes down to how you manage moisture and heat distribution. Cast iron and enameled cast iron behave differently because of their thermal mass and surface properties. Understanding these quirks helps you adjust your technique before the lid even goes on.
Cast iron retains heat aggressively. If you throw cold meat into a scorching hot enameled pot, the sudden temperature drop can cause the enamel to crack over time, and the meat will seize up, releasing juices too quickly. Start with medium-low heat and let the pot warm up gradually. This ensures even cooking and prevents the liquid from boiling away before the meat has a chance to brown properly.
Crowding the pot is the fastest way to turn your braise into a stew. When you add too much meat, the temperature plummets, and the meat steams in its own released moisture rather than searing. Work in batches to ensure each piece gets a deep, caramelized crust. This Maillard reaction builds the flavor foundation; without it, your dish will taste bland and one-dimensional, regardless of the spices you add later.
:max_bytes(150000):strip_icc()/dutch-ovens-grace-kelly-5ca6a5df252f41c1885d574cc88871a3.jpg)
After searing, you will see browned bits stuck to the bottom. These are flavor bombs. Pour in your wine, broth, or stock and scrape the bottom vigorously with a wooden spoon. Enameled surfaces hold these bits firmly, so don’t be gentle. If you skip this step, those flavors stay stuck to the pot instead of integrating into your sauce. This step also helps prevent scorching during the long simmer.
Enameled cast iron has a tight seal, which traps steam and reduces liquid slower than thin-walled pots. However, cast iron conducts heat so efficiently that you can still get hot spots if the liquid level is too low. Keep the liquid at least halfway up the meat. If you find yourself needing to add water, use hot water to maintain the internal temperature. Adding cold liquid shocks the pot and can extend cooking time unnecessarily.
A well-managed braise should coat the back of a spoon, not run like water. If your sauce is too thin, remove the lid for the last 20–30 minutes of cooking to allow excess moisture to evaporate. If it’s too thick, add a splash of broth or water. The goal is a glossy, cohesive sauce that clings to the meat, not a separate layer of grease or a dry, crumbly texture.
Swaps that still work
Use this section to make the Enameled vs Cast Iron Dutch Oven decision easier to compare in real life, not just on paper. Start with the reader's actual constraint, then separate must-have requirements from details that are merely nice to have. A practical choice should survive normal use, maintenance, timing, and budget. If a recommendation only works in an ideal situation, call that out plainly and give the reader a fallback path.
| Factor | What to check | Why it matters |
|---|---|---|
| Fit | Match the option to the primary use case. | A good deal still fails if it does not fit the job. |
| Condition | Verify age, wear, and service history. | Hidden condition issues erase upfront savings. |
| Cost | Compare purchase price with likely upkeep. | The cheapest option is not always the lowest-cost option. |
Serve and store it
Both enameled and cast iron Dutch ovens transition smoothly from stovetop to table, but their handling differs slightly. Cast iron retains heat longer, keeping stews warm for extra minutes, while enameled pots cool down faster, which is helpful if you are serving in a warm room or want to avoid overcooking delicate ingredients like greens added at the end.
For storage, enameled cast iron is low-maintenance. You can stack other pots inside it without worry, provided you place a soft liner or paper towel between them to prevent chipping the glass-like surface. Traditional bare cast iron requires more care; it must be completely dry to prevent rust. Store it in a dry place, and if stacking, use a protective layer to keep the seasoned surface intact.
When reheating leftovers, add a splash of water or broth to restore moisture. Cover the pot to trap steam. If using enameled cast iron, avoid sudden temperature shocks. Let the pot cool slightly before washing to preserve the enamel integrity.
Common questions
Choosing between enameled and raw cast iron often comes down to how you plan to use the pot and how much maintenance you want to handle. Here are the practical answers to the most common objections.
The tradeoff is essentially convenience versus longevity. Enameled pots offer a hassle-free cooking experience for acidic dishes like tomato sauces or wine reductions, which can react with raw iron. Raw iron offers superior heat retention and durability for high-heat tasks but demands consistent care to keep it rust-free and non-stick.
No comments yet. Be the first to share your thoughts!