
Dutch Oven Camping: Beyond the Beans
Dutch oven camping is experiencing a real revival, and it's not just about the nostalgia. For generations, the image of campfire cooking might have conjured up simple bean pots and stews, but modern dutch oven cooking is so much more. It’s about creating incredible, flavorful meals while connecting with the outdoors.
The history is long – early settlers and pioneers relied on these cast iron workhorses for cooking over open fires. But its current popularity stems from a desire for experiences; a move away from overly processed food and a longing for something a little slower and more intentional. Plus, a good cast iron dutch oven is incredibly versatile.
We’re going to explore 12 dutch oven recipes that will transform your next camping trip into a culinary adventure. From hearty breakfasts to decadent desserts, these recipes prove that you don't have to sacrifice flavor or variety when you're off the grid. Get ready to ditch the foil packets and embrace the magic of cast iron.

Gear Up: Dutch Ovens & Essentials
If you’re new to dutch oven cooking, the first step is acquiring the right equipment. There are two main types: traditional bare cast iron and enameled cast iron. Bare cast iron requires seasoning to prevent rust and sticking, but it’s incredibly durable and can withstand extremely high temperatures. Enameled dutch ovens are easier to clean and don’t require seasoning, but the enamel can chip if mishandled.
For camping, a 10-inch or 12-inch dutch oven is the sweet spot for most groups. A 10-inch is great for smaller parties (2-4 people), while a 12-inch can handle larger gatherings (4-6+). Lodge is a consistently recommended brand, known for its quality and affordability. Expect to pay around $60-$200 for a good quality dutch oven, depending on size and whether it’s enameled.
But the dutch oven itself is just the beginning. Essential accessories include a lid lifter (trust me, you’ll burn yourself without one), a charcoal chimney for lighting coals efficiently, a trivet to keep your food off the bottom of the oven, and heat-resistant gloves. Investing in these tools will make your life much easier and safer. While the initial cost can seem high, a well-maintained cast iron dutch oven will last a lifetime.
- Lid Lifter: Essential for safely removing the hot lid.
- Charcoal Chimney: Speeds up charcoal lighting.
- Trivet: Prevents scorching and allows for even heat distribution.
- Heat-Resistant Gloves: Protects your hands from burns.
Heat Control: Mastering Campfire Cooking
Controlling the temperature is arguably the biggest challenge in dutch oven camping. Unlike cooking on a stove, you don't have precise temperature settings. Instead, you manipulate the heat by adjusting the amount of charcoal or hot embers placed above and below the oven. A general rule of thumb is to use more coals on top than below – roughly a 2:1 ratio for baking and a 1:1 ratio for simmering.
The number of coals needed depends on the size of your oven and the desired temperature. A common guideline is that each coal provides approximately 25-30°F of heat. Wind is a major factor; it can quickly dissipate heat, requiring you to add more coals. Building a windbreak with rocks or a tarp can help maintain a consistent temperature. Experimentation is key.
Different fuel sources also affect heat. Charcoal briquettes burn more consistently than lump charcoal, but lump charcoal produces a cleaner burn and imparts a slightly smoky flavor. Wood fires are the most challenging to control, but they offer a unique and authentic camping experience. It takes practice to get a feel for how different fuels behave, so don’t be discouraged if your first few attempts aren’t perfect. It’s all part of the learning curve.
Breakfasts to Fuel Your Adventures
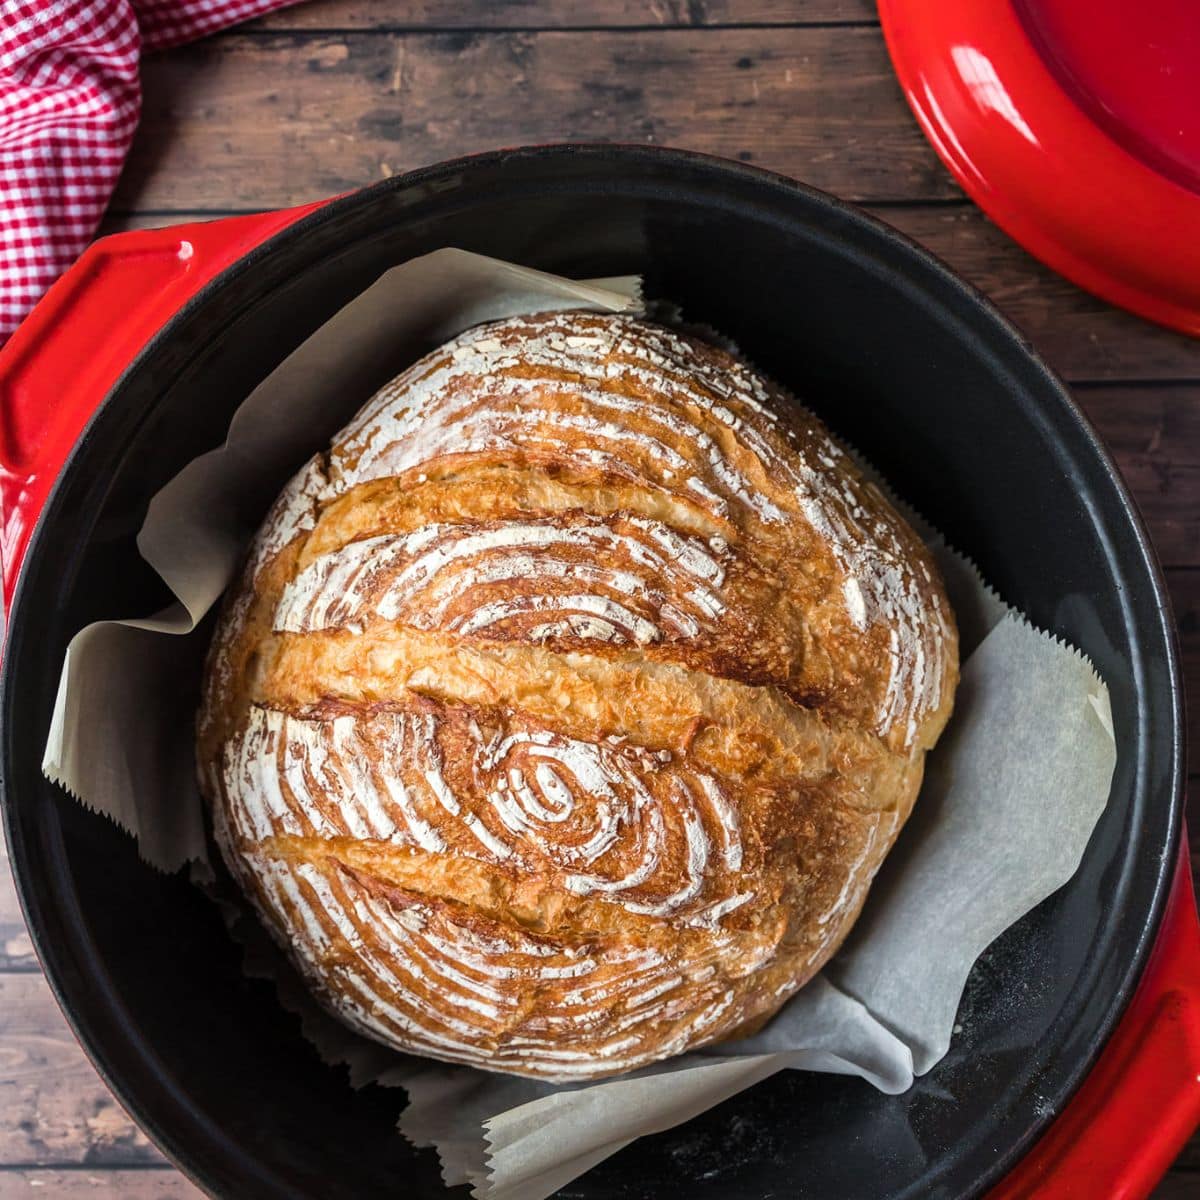
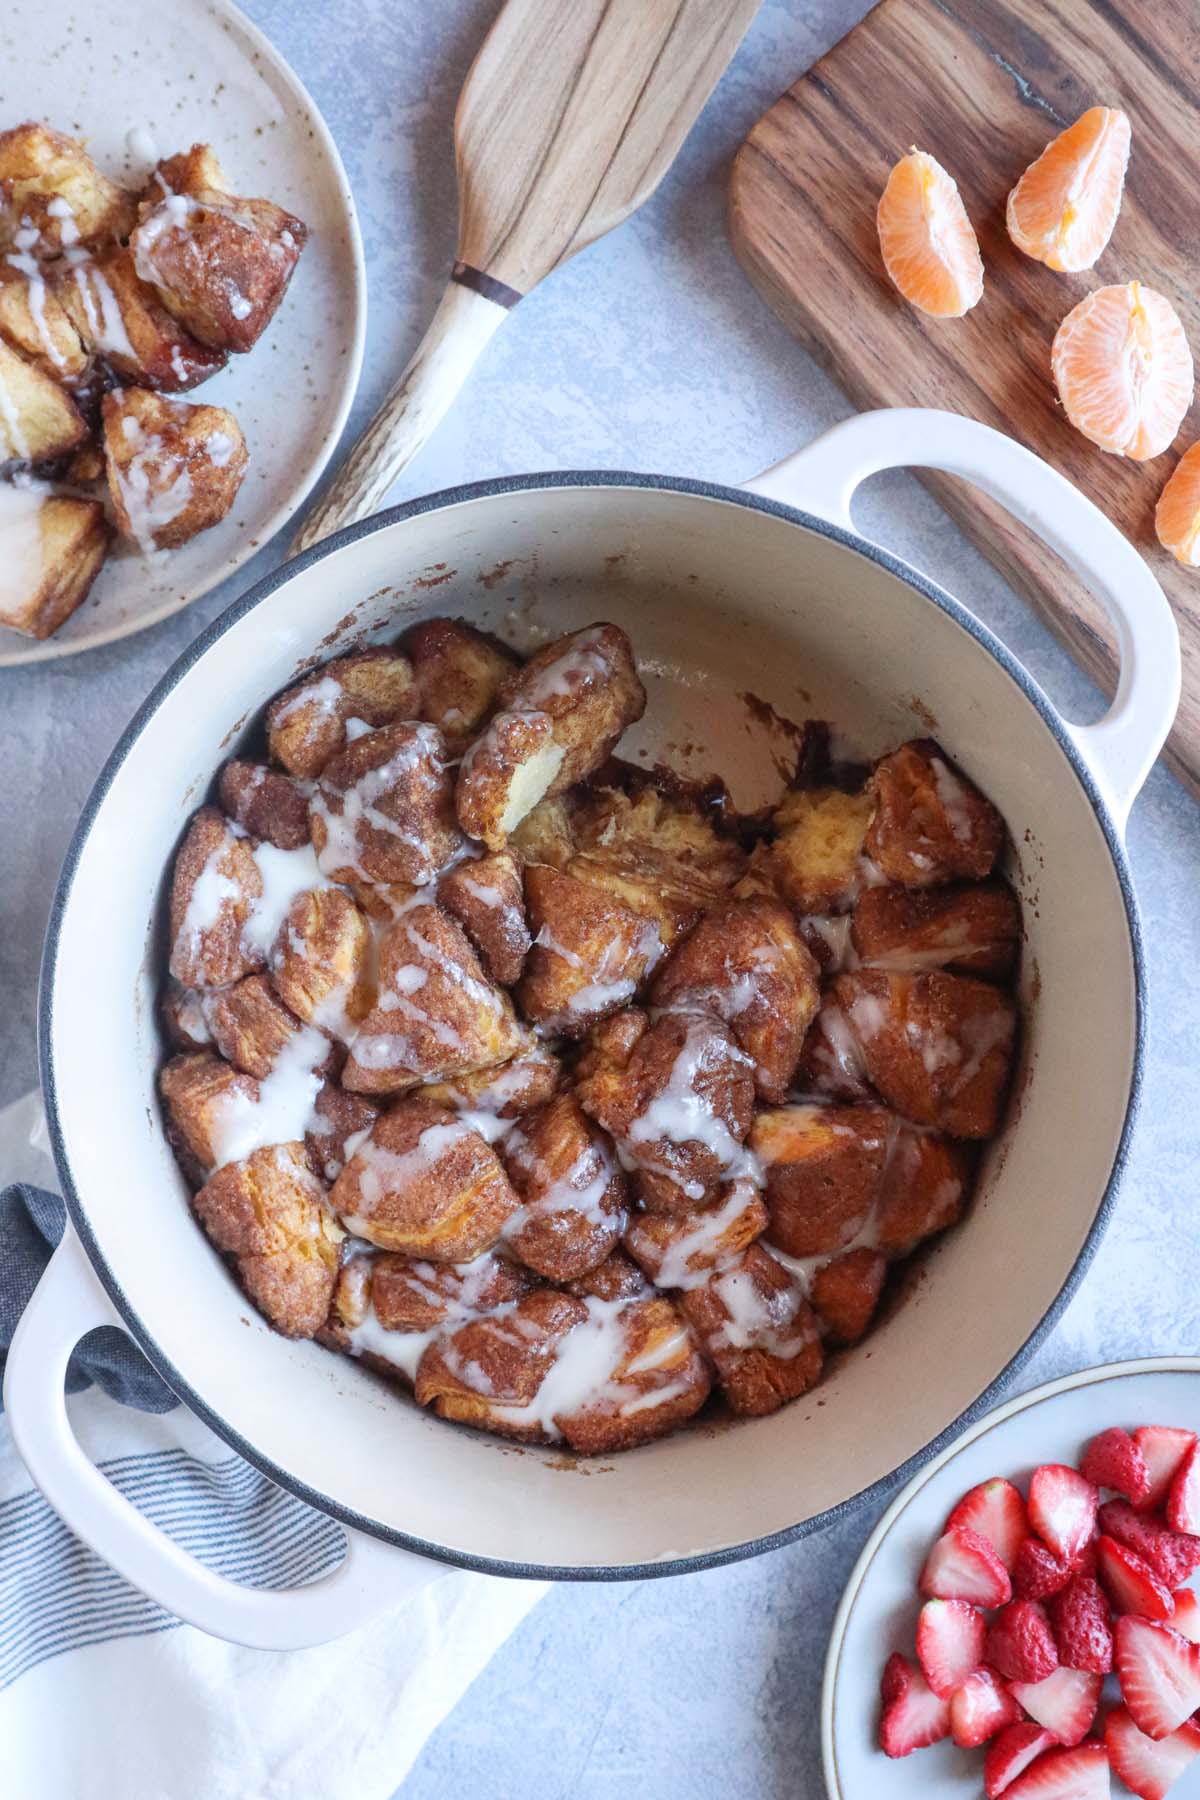
Start your day right with a hearty breakfast cooked in your dutch oven. A classic cinnamon roll bake is always a crowd-pleaser. Use pre-made dough to simplify things, and top with a generous glaze. The dutch oven keeps the rolls warm and gooey, perfect for a chilly morning. You can find many variations of this recipe online, but a simple one involves layering refrigerated cinnamon roll dough in a greased dutch oven and baking over medium heat.
For something more savory, try a breakfast hash with potatoes, sausage, and peppers. Dice your ingredients ahead of time and sauté them in the dutch oven until golden brown and cooked through. Add a few eggs towards the end to finish it off. A Dutch oven frittata is another excellent option – whisk eggs with your favorite vegetables and cheese, and bake until set. The even heat distribution ensures a perfectly cooked frittata every time.
The beauty of dutch oven breakfasts is their ability to keep food warm for extended periods, which is ideal for leisurely camping mornings. Prep as much as possible at home to minimize cleanup at the campsite. Consider pre-chopping vegetables or pre-cooking bacon to save time and effort. A warm breakfast is a great way to fuel up for a day of hiking or exploring.
- Cinnamon Roll Bake: Use pre-made dough for convenience.
- Breakfast Hash: Dice ingredients ahead of time.
- Dutch Oven Frittata: A versatile and easy option.
Lunchtime Victuals: Quick & Easy
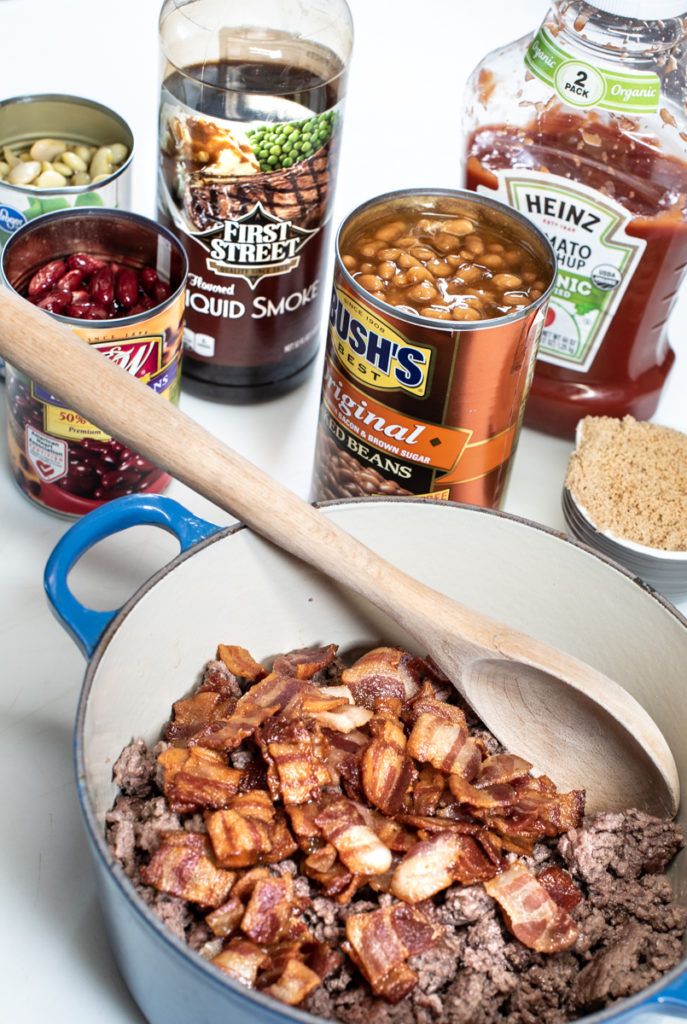
Lunch doesn’t need to be complicated when you’re camping. A chili recipe is a must-have for any dutch oven cook. Brown ground beef or turkey, add beans, tomatoes, and your favorite spices, and simmer for at least 30 minutes. The longer it simmers, the more flavorful it becomes. Chili is also incredibly versatile – top with cheese, sour cream, or onions.
Surprisingly, you can even make grilled cheese sandwiches in a dutch oven! Butter the outside of the bread, place cheese inside, and cook over medium-low heat until golden brown and the cheese is melted. It’s a comforting and satisfying lunch option. A simple pasta dish – like pasta with marinara sauce and sausage – is another quick and easy choice. Cook the pasta in the dutch oven, then add the sauce and sausage.
The key to lunchtime success is minimal cleanup. One-pot meals are your friend. Use disposable utensils and plates to further simplify things. Focus on recipes that require few ingredients and minimal preparation. A quick and easy lunch means more time for enjoying the outdoors.
Dinner Delights: The Main Event
Dinner is where the dutch oven truly shines. Drawing inspiration from sites like theirishmanswife.com, a roast chicken is a fantastic option. Season the chicken generously, place it in the dutch oven with root vegetables, and roast over medium heat until cooked through. The dutch oven creates a juicy and flavorful chicken with crispy skin.
A hearty beef stew is another classic dutch oven dinner. Brown the beef, add vegetables, broth, and herbs, and simmer for several hours. The long, slow cooking process tenderizes the beef and allows the flavors to meld together. Paella, a Spanish rice dish with seafood and chicken, is also surprisingly well-suited to dutch oven cooking. The even heat distribution ensures that the rice cooks perfectly.
Recipes that benefit from slow cooking and even heat distribution are ideal for the dutch oven. These dishes tend to be more flavorful and tender as a result. Don’t be afraid to experiment with different flavors and ingredients. The dutch oven is a versatile tool that can handle a wide range of cuisines. A sturdy table is essential for safely placing a hot dutch oven.
- Roast Chicken: Crispy skin and juicy meat.
- Beef Stew: Tender beef and flavorful broth.
- Paella: Perfectly cooked rice and delicious seafood.
Dutch Oven Camping Dinner Recipe Comparison
| Recipe | Estimated Cook Time | Difficulty | Ingredient Accessibility (Campground) | Impressiveness (Wow Factor) |
|---|---|---|---|---|
| Campfire Chili 🌶️ | 2-3 hours | Easy | High | Good - a classic comfort food. |
| Roast Chicken & Vegetables 🍗 | 2.5-3.5 hours | Medium | Moderate - requires pre-cut vegetables or bringing whole chicken | Very Good - visually appealing and flavorful. |
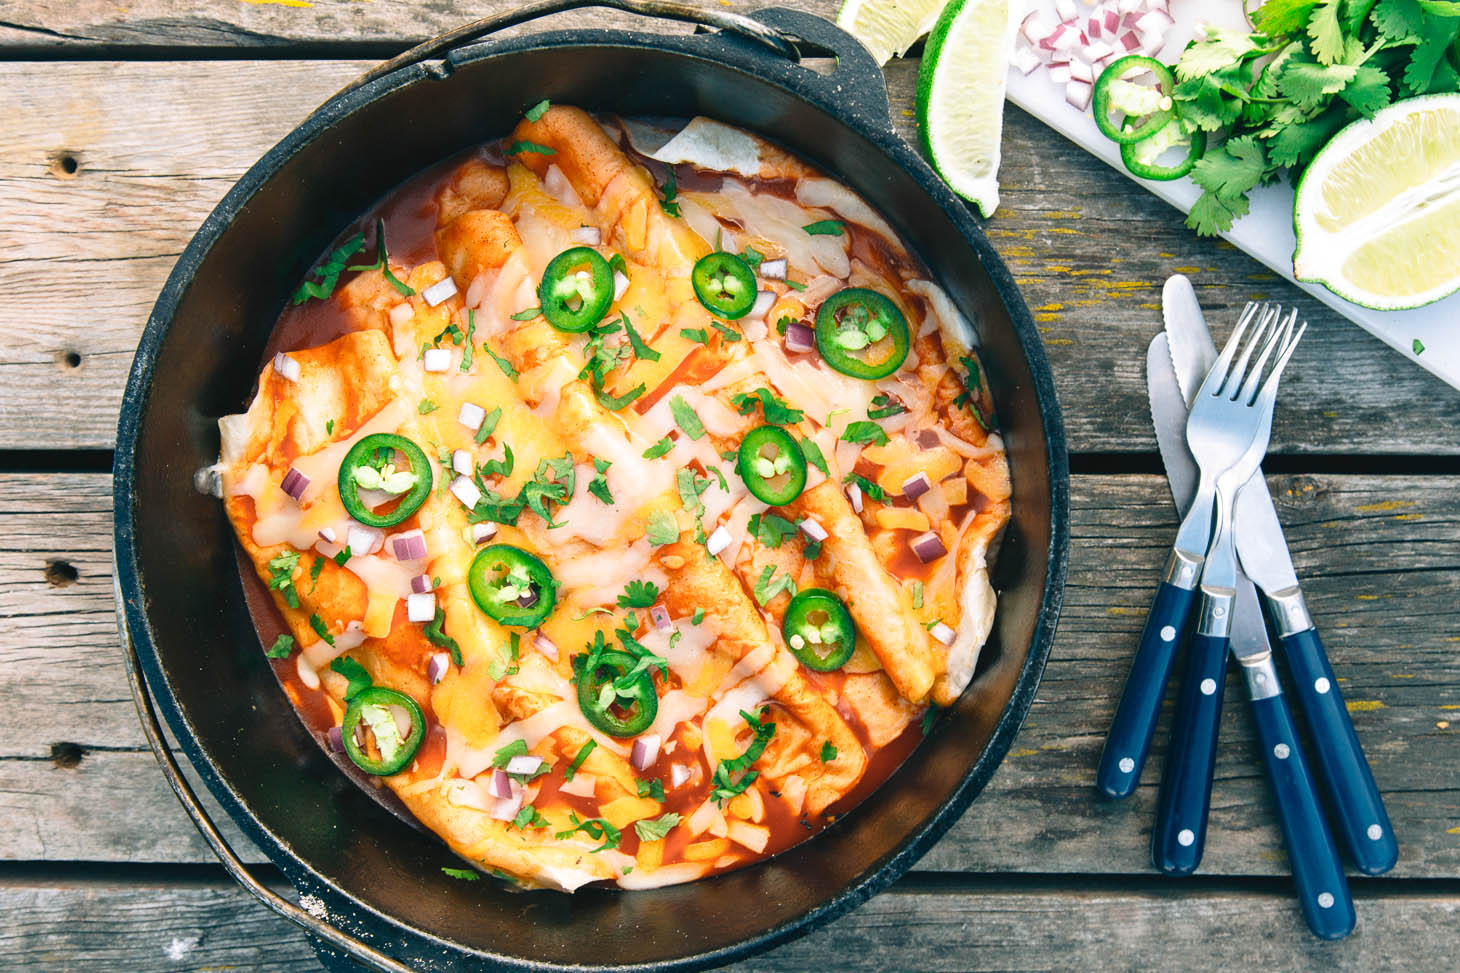
| Dutch Oven Pizza 🍕 | 45-60 minutes | Medium | Moderate - dough requires preparation or purchase, toppings need refrigeration | Excellent - unexpected and fun! |
| Shepherd's Pie 🥧 | 1.5-2 hours | Medium | Moderate - ground meat and potatoes are generally available | Good - hearty and satisfying. |
| Peach Cobbler 🍑 | 45-60 minutes | Easy | Moderate - peaches may be seasonal/require pre-planning | Good - a sweet treat is always appreciated. |
| Beef Stew 🍲 | 3-4 hours | Easy | High - most ingredients are non-perishable | Good - a warming and flavorful option. |
| Breakfast Hash 🍳 | 30-45 minutes | Easy | High - adaptable to available ingredients | Moderate - a filling and customizable breakfast for dinner. |
Illustrative comparison based on the article research brief. Verify current pricing, limits, and product details in the official docs before relying on it.
Sweet Endings: Dutch Oven Desserts
No camping trip is complete without dessert. Cobblers are a natural fit for the dutch oven – peach, berry, or apple cobbler are all excellent choices. Top a fruit filling with a biscuit or cake batter and bake until golden brown and bubbly. The dutch oven creates a moist and evenly baked cobbler.
A chocolate cake is another decadent option. Use a boxed cake mix to simplify things, or make your own from scratch. The dutch oven helps to create a rich and fudgy cake. Bread pudding is also surprisingly good cooked in a dutch oven – use stale bread, custard, and your favorite add-ins.
The dutch oven’s ability to maintain a consistent temperature makes it ideal for baking desserts. It creates a moist and evenly baked result every time. Don’t be afraid to get creative with your toppings – whipped cream, ice cream, or a drizzle of chocolate sauce are always welcome.
Beyond the Recipes: Tips & Tricks
Proper seasoning is crucial for maintaining a cast iron dutch oven. After each use, clean the oven with hot water and a scrub brush. Dry it thoroughly and lightly coat it with oil. This will prevent rust and keep the surface non-stick. To prevent food from sticking, ensure the dutch oven is properly heated before adding ingredients. A hot oven will create a barrier that prevents sticking.
Packing and transporting a dutch oven can be challenging. Wrap it in towels or blankets to protect it from damage. Consider using a dedicated carrying case. Always be mindful of safety when handling a hot dutch oven. Use lid lifters and heat-resistant gloves to avoid burns. Be careful when handling hot coals or embers.
Regular maintenance will ensure that your dutch oven lasts for generations. With a little care and attention, it will become a cherished part of your camping adventures. Don't be afraid to experiment and try new recipes. The dutch oven is a versatile tool that can help you create unforgettable meals in the great outdoors.
- Seasoning: Clean, dry, and lightly oil after each use.
- Preventing Sticking: Ensure the oven is properly heated.
- Packing: Wrap in towels or use a carrying case.
No comments yet. Be the first to share your thoughts!