
Dutch Ovens & the 2026 Plate
Plant-based eating is no longer a fleeting trend; it's becoming ingrained in how people approach food. Predictions for 2026 show a continued acceleration of this movement, fueled by health and environmental awareness. Gut health is a specific focus, driven by research linking the microbiome to overall wellness, and demand for convenient, nutritious meal solutions is increasing. Sustainability is also paramount, with consumers seeking ways to reduce food waste and their carbon footprint.
The Dutch oven, a cooking vessel experiencing a resurgence, is well-suited to modern plant-based cooking. Its even heat distribution is ideal for simmering vegan stews and braises, preventing scorching and ensuring consistent results. It also excels in the oven for baking bread or roasting vegetables.
The Dutch oven's capacity for one-pot meals is a huge benefit for meal prepping. Fewer dishes mean less cleanup, and cooking an entire meal in a single vessel simplifies the process. This appeals to those seeking convenient, healthy options. The combination of a growing dietary preference and a practical tool makes the Dutch oven a cornerstone of the 2026 kitchen.
Historically, Dutch ovens were workhorses for slow-cooked meals, a legacy that translates well to plant-based cuisine. Many vegan dishes benefit from long, slow cooking times to develop deep, complex flavors. Hearty lentil stews, flavorful bean chilis, or richly spiced curries are examples. The Dutch oven accommodates and enhances vegan cooking.
Essential Dutch Oven Techniques for Vegan Cooking
Building flavor in vegan cooking requires a different approach than using meat as a base. Without rendered fats and meat-based umami, you need to layer flavors strategically. Sautéing aromatics like onions, garlic, and ginger is important, and incorporating ingredients like dried mushrooms, nutritional yeast, and miso paste adds depth and savoriness. These ingredients provide the umami punch often missing in plant-based dishes.
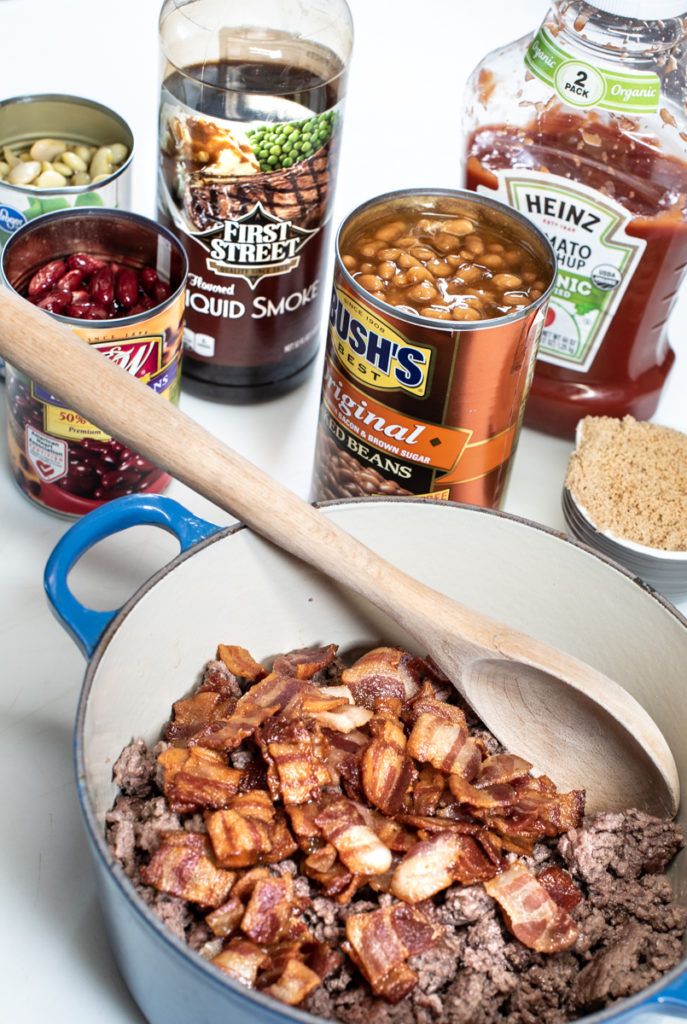
Preventing sticking can be a concern when cooking plant-based proteins like tofu or tempeh. A well-seasoned Dutch oven is the first step. Using a generous amount of oil or cooking liquid is also essential. Adding a splash of soy sauce or liquid smoke to the cooking liquid can help prevent sticking and add flavor. Deglaze the bottom of the pot frequently, scraping up any browned bits to incorporate into the dish.
Managing liquid levels is important in vegan stews and braises. Plant-based proteins and vegetables often absorb more liquid than animal-based counterparts. Start with enough liquid, and check it periodically throughout cooking, adding more as needed. Ensure the ingredients are mostly submerged, but not swimming in liquid.
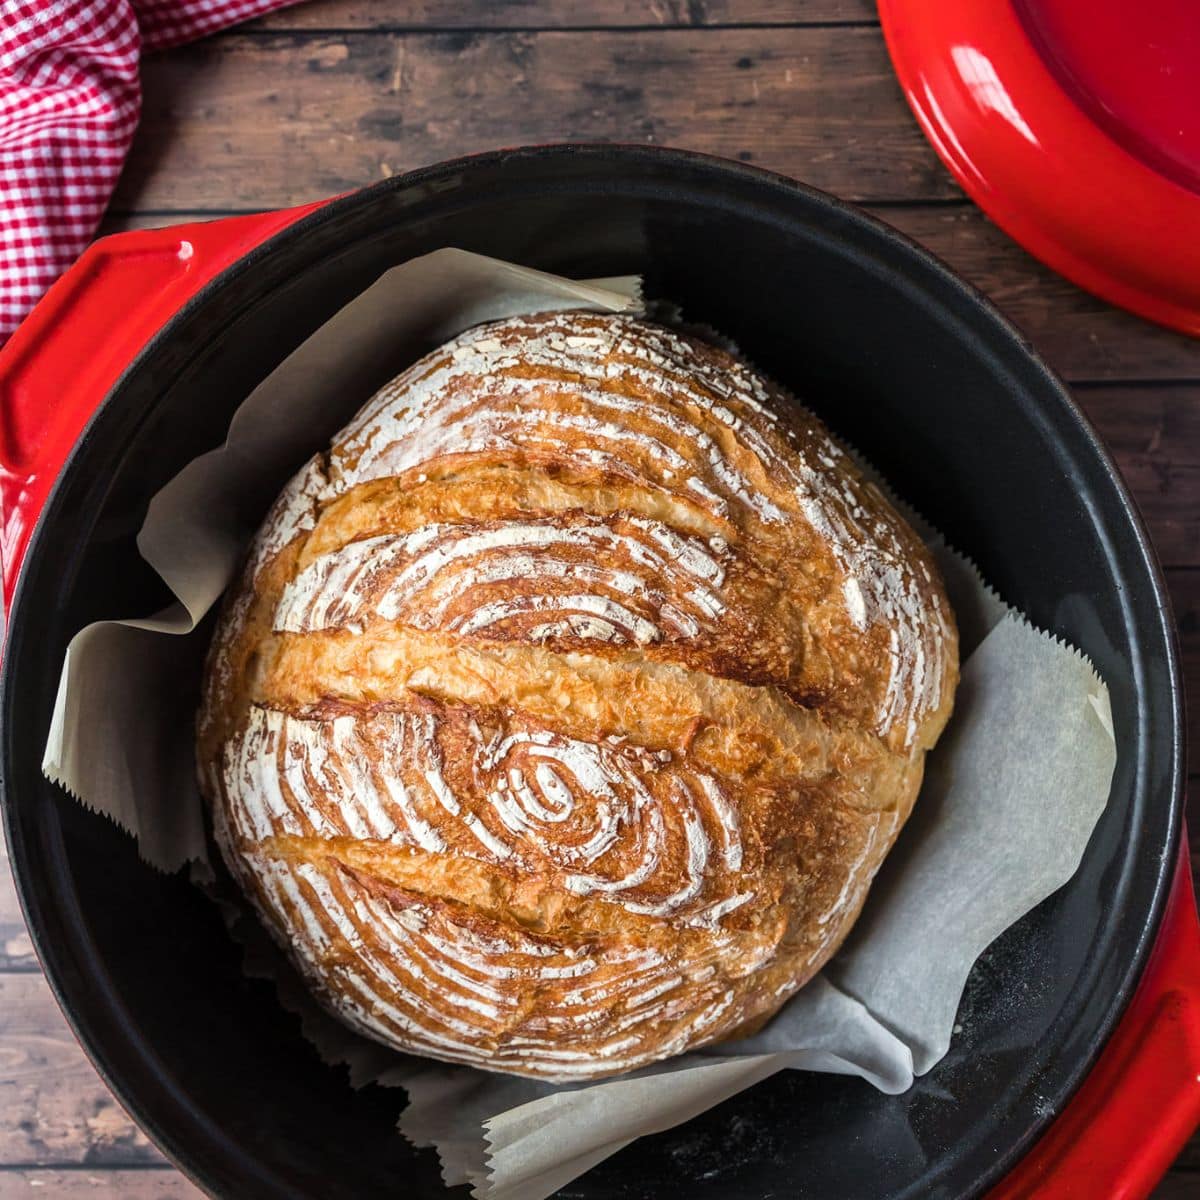
The Dutch oven is not limited to stovetop cooking. It is a fantastic vessel for baking vegan bread and desserts. The heavy lid traps moisture, creating a steamy environment ideal for a good rise and a tender crumb. No-knead bread recipes are well-suited to the Dutch oven, and fruit crumbles bake with a golden, crispy topping.
10 Vegan Recipes for Dutch Oven Meal Prep
These recipes are designed for meal prep—they yield generous portions, store well, and reheat well. Each recipe assumes a 5-6 quart Dutch oven, though adjustments can be made for different sizes.
Lentil Shepherd's Pie: A hearty and comforting classic, reimagined with lentils. This recipe makes enough for 4-6 servings and keeps well in the fridge for up to 4 days. The lentil base is rich and flavorful, topped with a creamy mashed sweet potato topping.
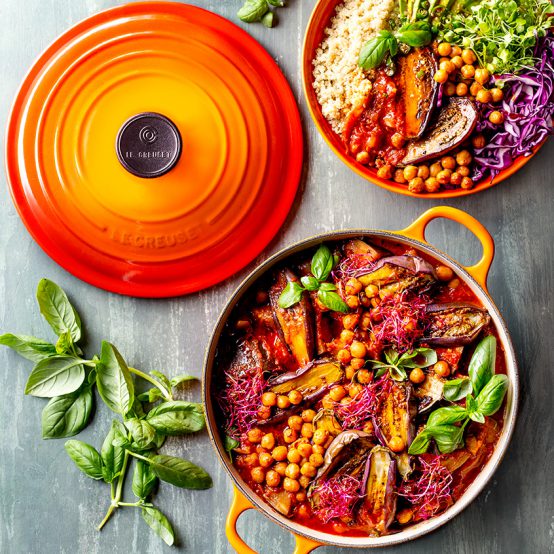
Moroccan Chickpea Tagine: A fragrant and flavorful stew with chickpeas, vegetables, and warming spices. This tagine improves with age, making it perfect for making ahead. It stores well for up to 5 days and is delicious served with couscous or quinoa.
Black Bean Soup: A simple yet satisfying soup packed with protein and fiber. This soup is quick to make and freezes exceptionally well. It's a great option for a quick and easy lunch or dinner.
Vegan Chili: A classic comfort food, made with beans, vegetables, and a smoky blend of spices. This chili is even better the next day, allowing the flavors to meld. It’s a great make-ahead option for busy weeknights.
Hearty Vegetable Stew: A robust stew featuring a medley of seasonal vegetables and plant-based protein. This stew is incredibly versatile – feel free to substitute your favorite vegetables. It’s a healthy and filling meal that keeps well for up to 4 days.
Spanish Rice with Saffron: A vibrant and flavorful rice dish infused with saffron and vegetables. This rice dish is a great side dish or can be enjoyed as a main course. It reheats well and is perfect for meal prepping.
Italian White Bean & Kale Soup: A hearty and nutritious soup packed with white beans, kale, and Italian herbs. This soup is a great way to get your greens and is perfect for a cold winter day. It stores well for up to 3 days.
Coconut Curry with Sweet Potatoes & Spinach: A creamy and flavorful curry with sweet potatoes, spinach, and coconut milk. This curry is a great way to incorporate more vegetables into your diet. It’s delicious served with rice.
Vegan Jambalaya: A flavorful and spicy rice dish inspired by Louisiana cuisine. This jambalaya is packed with vegetables and plant-based protein. It’s a great option for a hearty and satisfying meal. The recipe is a bit more involved, but the payoff is worth it.
Apple Crumble: For a sweet treat, this Dutch oven apple crumble is a crowd-pleaser. The crumble topping gets beautifully golden and crispy in the Dutch oven. It’s best served warm with a scoop of vegan ice cream.
Recipe Standouts: Tagine & Jambalaya
The Moroccan Chickpea Tagine shines in a Dutch oven. The heavy bottom ensures even heat distribution, preventing spices from burning and allowing flavors to meld. Use good quality saffron for the best flavor. Add preserved lemons or toasted almonds before serving. A traditional tagine is served with couscous, but quinoa or brown
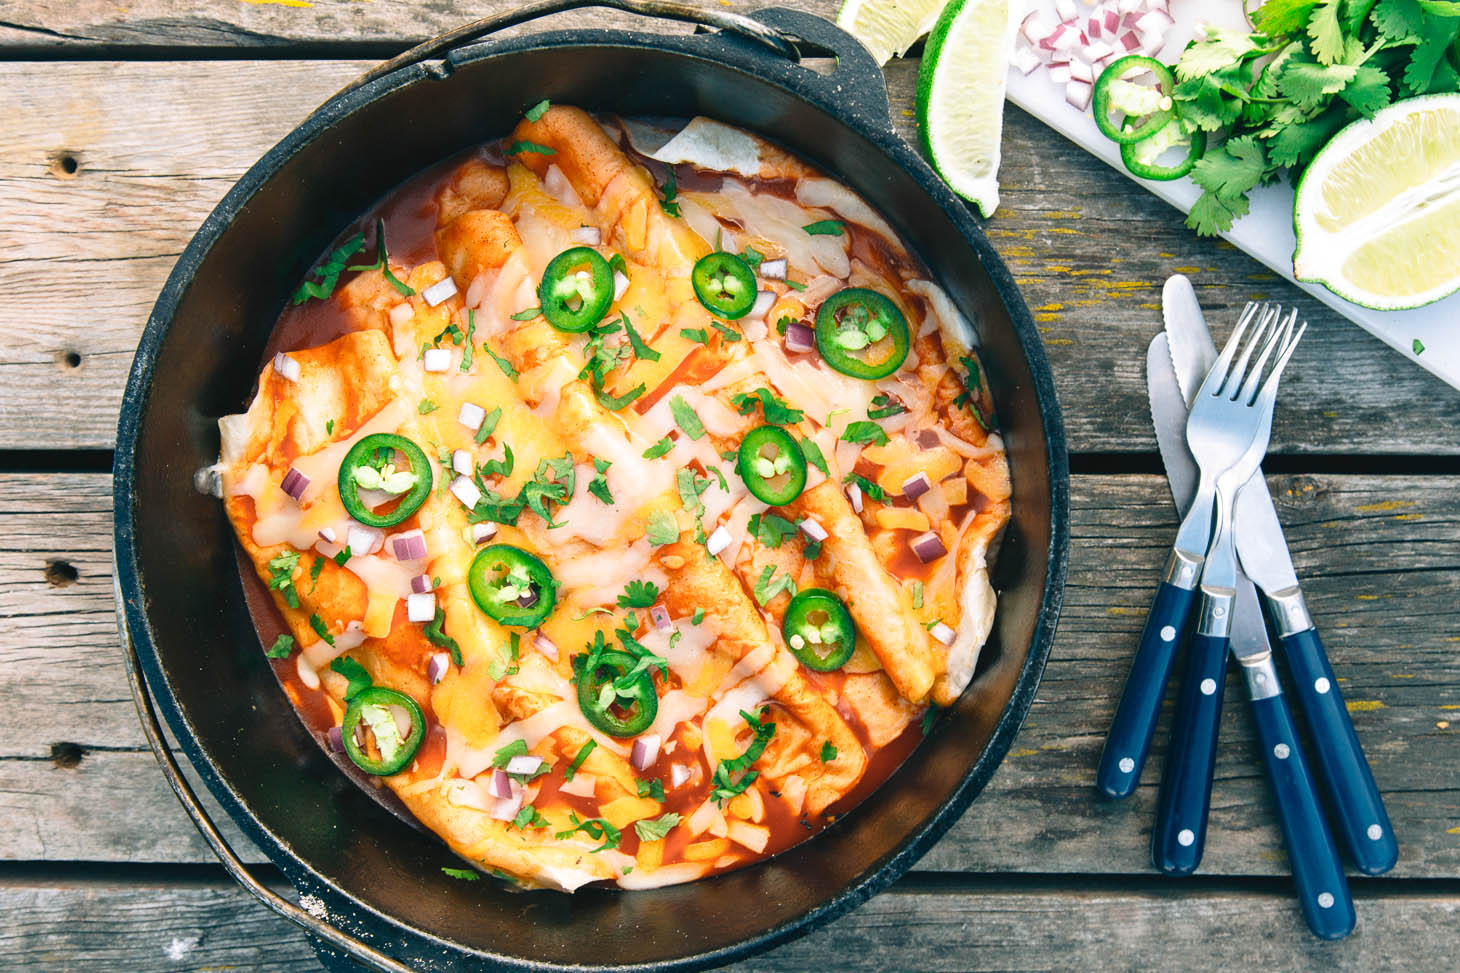
For the Vegan Jambalaya, the Dutch oven’s ability to retain heat is key to achieving that slightly charred, smoky flavor characteristic of traditional jambalaya. Using smoked paprika is essential, and I suggest adding a dash of liquid smoke for an extra layer of smokiness. Don't be afraid to adjust the spice level to your liking. A side of vegan cornbread complements the jambalaya perfectly. The dish's origins lie in Spanish paella and French cuisine, adapted over time in Louisiana.
When making the Tagine, remember to bloom the spices in oil before adding the vegetables. This helps to release their flavors. For the Jambalaya, sautéing the vegetables in batches prevents overcrowding and ensures they brown properly. Both recipes benefit from a long, slow simmer, allowing the flavors to deepen and develop.
Optimizing Storage & Reheating
Proper storage is essential for maintaining the quality of your Dutch oven meal prepped creations. Glass containers are generally preferred for storing food, as they don’t absorb odors or stains. However, high-quality plastic containers are also a viable option. Stainless steel containers are durable and easy to clean, but can be more expensive. Avoid storing acidic foods in cast iron for extended periods, as it can affect the seasoning.
Most Dutch oven meals will last for 3-5 days in the refrigerator. For longer storage, freezing is a great option. Allow the food to cool completely before transferring it to freezer-safe containers. Properly frozen meals can last for up to 3 months. When reheating, gently warm the food on the stovetop or in the oven, avoiding high heat, which can dry it out.
To maintain flavor and texture, avoid repeatedly reheating the same portion of food. It's best to portion out individual servings before reheating. If reheating in the oven, cover the dish to prevent it from drying out. Adding a splash of water or broth can also help to restore moisture.
Food Storage Container Comparison for Meal Prepped Dishes
| Material | Cost | Durability | Microwave Safety | Environmental Impact |
|---|---|---|---|---|
| Glass | Higher Initial Cost | Very Good - Resistant to shattering with proper use | Generally Safe - Check manufacturer's instructions | Better - Recyclable, made from natural materials |
| Plastic (BPA-Free) | Lower Initial Cost | Moderate - Prone to cracking or warping | Variable - Some are not microwave safe | Moderate - Recycling can be complex, potential for plastic waste |
| Stainless Steel | Moderate to Higher Cost | Excellent - Highly durable and long-lasting | Safe | Better - Highly recyclable, durable reducing replacement frequency |
| Plastic (Reusable, Various Types) | Lowest Initial Cost | Lower - Can degrade with repeated use & washing | Variable - Check for microwave-safe labeling | Lower - Recycling challenges, contributes to plastic waste |
| Silicone | Moderate Cost | Good - Flexible and heat resistant | Generally Safe - Check manufacturer's instructions | Moderate - Recycling options are limited |
Qualitative comparison based on the article research brief. Confirm current product details in the official docs before making implementation choices.
Dutch Oven Care: Keeping It Vegan-Friendly
Maintaining a well-seasoned Dutch oven is crucial for successful plant-based cooking. Avoid using harsh soaps or abrasive cleaners, as they can strip away the seasoning. Instead, use warm water and a soft sponge or brush to clean the Dutch oven. For stubborn food residue, you can simmer water in the Dutch oven for a few minutes to loosen the debris.
Rust can be a concern, especially if the Dutch oven isn't dried thoroughly after washing. If rust does appear, scrub it away with steel wool and re-season the Dutch oven. Re-seasoning involves coating the Dutch oven with a thin layer of oil and baking it in the oven at a high temperature. This creates a protective layer that prevents rust and ensures food doesn't stick.
There's a common misconception that acidic vegan ingredients like tomatoes can damage the seasoning of a Dutch oven. While it's true that prolonged exposure to acidity can weaken the seasoning, it's not a significant concern if you clean and maintain the Dutch oven properly. Avoid simmering tomato-based sauces for extended periods, and always re-season the Dutch oven if you notice any signs of seasoning loss.
Beyond the Recipes: Dutch Oven Adaptations
Don't limit yourself to the recipes provided. The Dutch oven is remarkably adaptable to a wide range of vegan dishes. Consider using it to make vegan pot pies, casseroles, or even bread puddings. Experiment with different flavor combinations and ingredients to create your own signature dishes.
The Dutch oven excels at braising, a cooking method that's perfect for tenderizing tough vegetables and developing deep flavors. You can also use it for roasting vegetables, achieving a beautiful caramelized crust. Baking is another area where the Dutch oven shines, particularly for breads and desserts.
While deep frying in a Dutch oven is possible, it requires caution. The heavy cast iron retains heat effectively, but it also means the oil will heat up quickly. Use a thermometer to monitor the oil temperature closely and avoid overheating. Always use a splatter screen to prevent burns. I generally recommend using other methods for deep frying, but the Dutch oven can work in a pinch.
I encourage you to explore online forums and communities dedicated to Dutch oven cooking. You’ll find a wealth of inspiration and tips from other home cooks. Don’t be afraid to experiment and share your own creations!
What vegan dish should we tackle in the Dutch oven next?
We are always looking to expand our plant-based Dutch oven repertoire. Cast iron excels at building deep, complex flavors in global cuisines, so tell us which direction you want us to go. Vote below and help shape our next recipe feature.
No comments yet. Be the first to share your thoughts!