
Dutch oven bread: A return to simplicity
There's a primal satisfaction in baking your own bread. The smell filling the kitchen, the warm loaf in your hands – it’s a connection to generations past. But for many, the idea of homemade bread conjures images of laborious kneading and precise techniques. That’s where the Dutch oven comes in, offering a remarkably simple path to artisan-quality loaves.
Dutch oven baking isn’t a new phenomenon. In fact, it's a return to how many people baked for centuries. Before the advent of modern ovens, the Dutch oven, with its thick walls and tight-fitting lid, was a kitchen staple. It allowed for consistent, even heat and created the ideal environment for a beautiful, crusty loaf. Now, it’s experiencing a well-deserved resurgence in popularity.
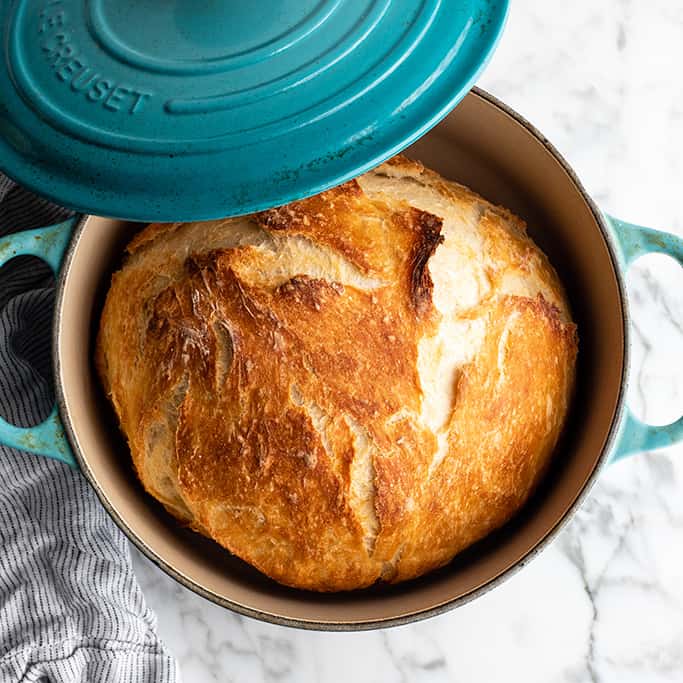
What’s truly appealing is the accessibility. Many fantastic Dutch oven bread recipes require absolutely no kneading. The process is more about time and patience than skill. A simple mix of flour, water, yeast, and salt, a long rise, and a hot Dutch oven are all you need. The result? A loaf with a perfectly crisp crust and a soft, airy interior – a testament to the power of simple ingredients and a good piece of cookware.
The Science of Crust: Why Dutch Ovens Work
Dutch oven bread works by trapping steam. When you place dough into a preheated Dutch oven, the moisture released is contained within the enclosed space. This humid environment around the loaf inhibits early crust formation, allowing the bread to expand fully for a lighter, airier crumb.
The steam isn’t the only factor. The thick cast iron walls of a Dutch oven excel at retaining heat. Maintaining a consistent, high temperature is essential for proper oven spring (the rapid rise of the bread in the oven) and even baking. This even heat distribution prevents hot spots that can lead to a burnt crust or an underbaked interior.
Consider what happens at a molecular level. The high heat and presence of steam encourage the Maillard reaction – a chemical reaction between amino acids and reducing sugars that’s responsible for the browning and complex flavors we associate with baked goods. The Dutch oven environment maximizes this reaction, leading to a more flavorful and visually appealing loaf.
Five Loaves to Master: Our 2026 Roundup
Let's get baking. Here are five Dutch oven bread recipes to elevate your home baking game. These recipes range in complexity, offering something for every skill level and palate. Each recipe assumes a 5-6 quart Dutch oven. Adjust baking times slightly if yours differs significantly.
1. Classic No-Knead Bread: This is the gateway loaf. Simple ingredients, minimal effort, and consistently delicious results. It's a great starting point for anyone new to Dutch oven baking. Expect a rustic, slightly tangy flavor and a beautifully blistered crust. Bake time: 45 minutes at 450°F.
Recipe: 3 cups all-purpose flour, 1 ½ tsp salt, ½ tsp active dry yeast, 1 ½ cups warm water. Combine ingredients, cover, and let rise for 12-18 hours. Gently shape, place in a Dutch oven, cover, and bake for 30 minutes. Remove lid and bake for another 15 minutes.
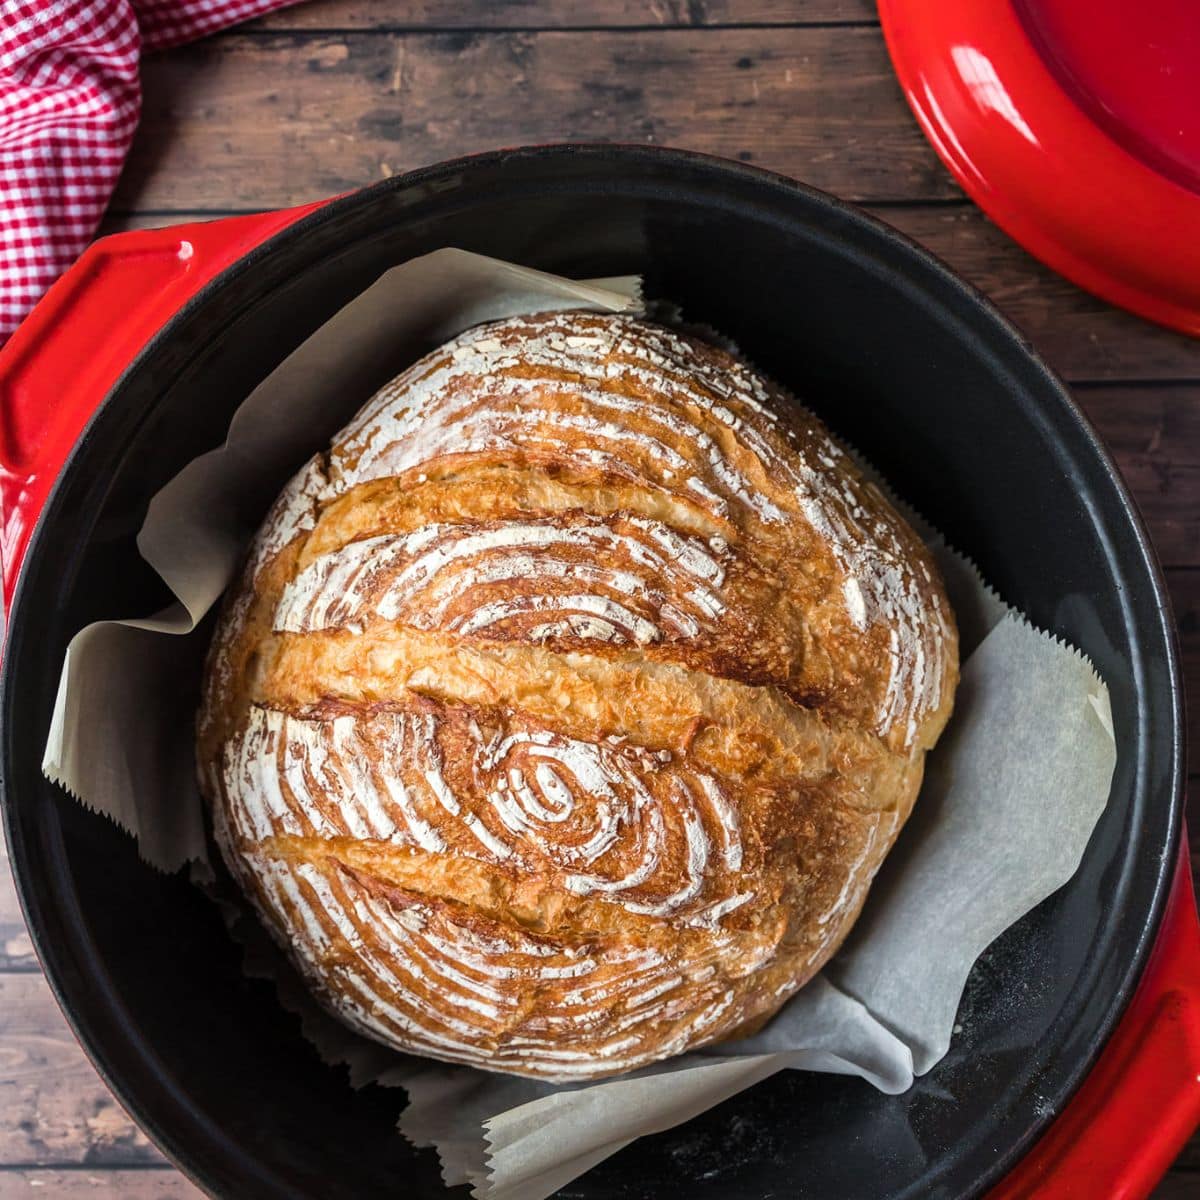
2. Sourdough Dutch Oven Bread: A step up in complexity, but well worth the effort. This recipe requires an active sourdough starter but delivers a complex, tangy flavor and a chewy texture. The long fermentation process enhances both flavor and digestibility. Bake time: 50 minutes at 450°F.
Recipe: 300g bread flour, 200g water, 100g active sourdough starter, 6g salt. Autolyse flour and water for 30 minutes. Add starter and salt, mix well, bulk ferment for 4-6 hours with folds. Shape, proof overnight in the fridge, bake covered for 20 minutes, uncovered for 30 minutes.
3. Rosemary and Olive Dutch Oven Bread: Infused with the fragrant flavors of rosemary and the briny goodness of olives, this loaf is perfect with soups or as an appetizer. The addition of olives adds a delightful chewiness. Bake time: 40 minutes at 450°F.
Recipe: Use the classic no-knead recipe, adding 1/4 cup chopped Kalamata olives and 2 tablespoons chopped fresh rosemary to the initial dough mixture. Proceed as directed.
4. Cheddar Jalapeño Dutch Oven Bread: A spicy, cheesy delight! This loaf is a crowd-pleaser, offering a balance of sharp cheddar and a pleasant kick from the jalapeños. It's fantastic served warm with butter. Bake time: 45 minutes at 450°F.
Recipe: Use the classic no-knead recipe, adding 1 cup shredded cheddar cheese and 1-2 finely chopped jalapeños (seeds removed for less heat) to the initial dough mixture. Proceed as directed.
5. Milk and Honey Dutch Oven Bread: A softer, slightly sweeter loaf, perfect for sandwiches or toast. The addition of milk and honey creates a tender crumb and a subtle sweetness. Bake time: 42 minutes at 450°F.
Recipe: 3 cups bread flour, 1 ½ tsp salt, ½ tsp active dry yeast, 1 cup warm milk, 2 tbsp honey. Combine ingredients, cover, and let rise for 12-18 hours. Gently shape, place in a Dutch oven, cover, and bake for 30 minutes. Remove lid and bake for another 12 minutes.
Five Dutch oven bread recipes
Even with foolproof recipes, things can sometimes go wrong. Don't be discouraged! Baking is a learning process. Here’s a guide to addressing some common Dutch oven bread issues.
Flat Loaf: Often caused by old yeast or insufficient rise time. Ensure your yeast is fresh and allow the dough to rise fully, ideally in a warm place. A longer, slower rise generally yields better results.
Gummy Texture: Typically indicates the bread wasn't baked long enough. Increase baking time by 5-10 minutes, and ensure your oven temperature is accurate. A slightly longer bake will help set the crumb.
Burnt Crust: Lower the oven temperature by 25°F or place a baking sheet on the rack above the Dutch oven to shield the crust. It's also possible your Dutch oven is positioned too close to the heating element.
Sticking to the Dutch Oven: Ensure your Dutch oven is well-seasoned. Generously flour the bottom of the Dutch oven before placing the dough inside. Parchment paper is also a helpful barrier.
Uneven Baking: Rotate the Dutch oven halfway through baking. This helps compensate for any hot spots in your oven. Preheat your Dutch oven for at least 30 minutes at the baking temperature to ensure even heat distribution.
Beyond the Basic Loaf: Flavor Variations
Once you've mastered the basic Dutch oven bread recipe, the possibilities are endless. Experimenting with different flavors and ingredients is a rewarding way to personalize your baking.
Adding olives and rosemary is a classic combination. Use about 1/2 cup of chopped Kalamata olives and 2 tablespoons of chopped fresh rosemary per standard loaf. Whole wheat flour can be substituted for up to half of the all-purpose flour for a nuttier flavor and increased nutritional value. Reduce water slightly, about 1-2 tablespoons per cup of whole wheat flour.
For a sweet treat, incorporate 1/2 cup of dried cranberries and 1/4 cup of chopped walnuts. A sprinkle of cinnamon can also enhance the flavor. Cheese and jalapeños are always a hit—use about 1 cup of shredded cheddar and 1-2 finely diced jalapeños. Don’t be afraid to get creative!

No comments yet. Be the first to share your thoughts!