
Why a Dutch Oven is Essential for Sourdough
Sourdough baking has seen a huge resurgence, and for good reason – that tangy flavor and satisfying crust are hard to beat. But achieving consistent results at home can be tricky. That’s where a Dutch oven comes in. It’s not just a trendy piece of cookware; it’s a scientifically sound tool for creating bakery-quality loaves. The high heat retention of cast iron, combined with the enclosed environment, mimics a professional brick oven, which is exactly what sourdough needs.
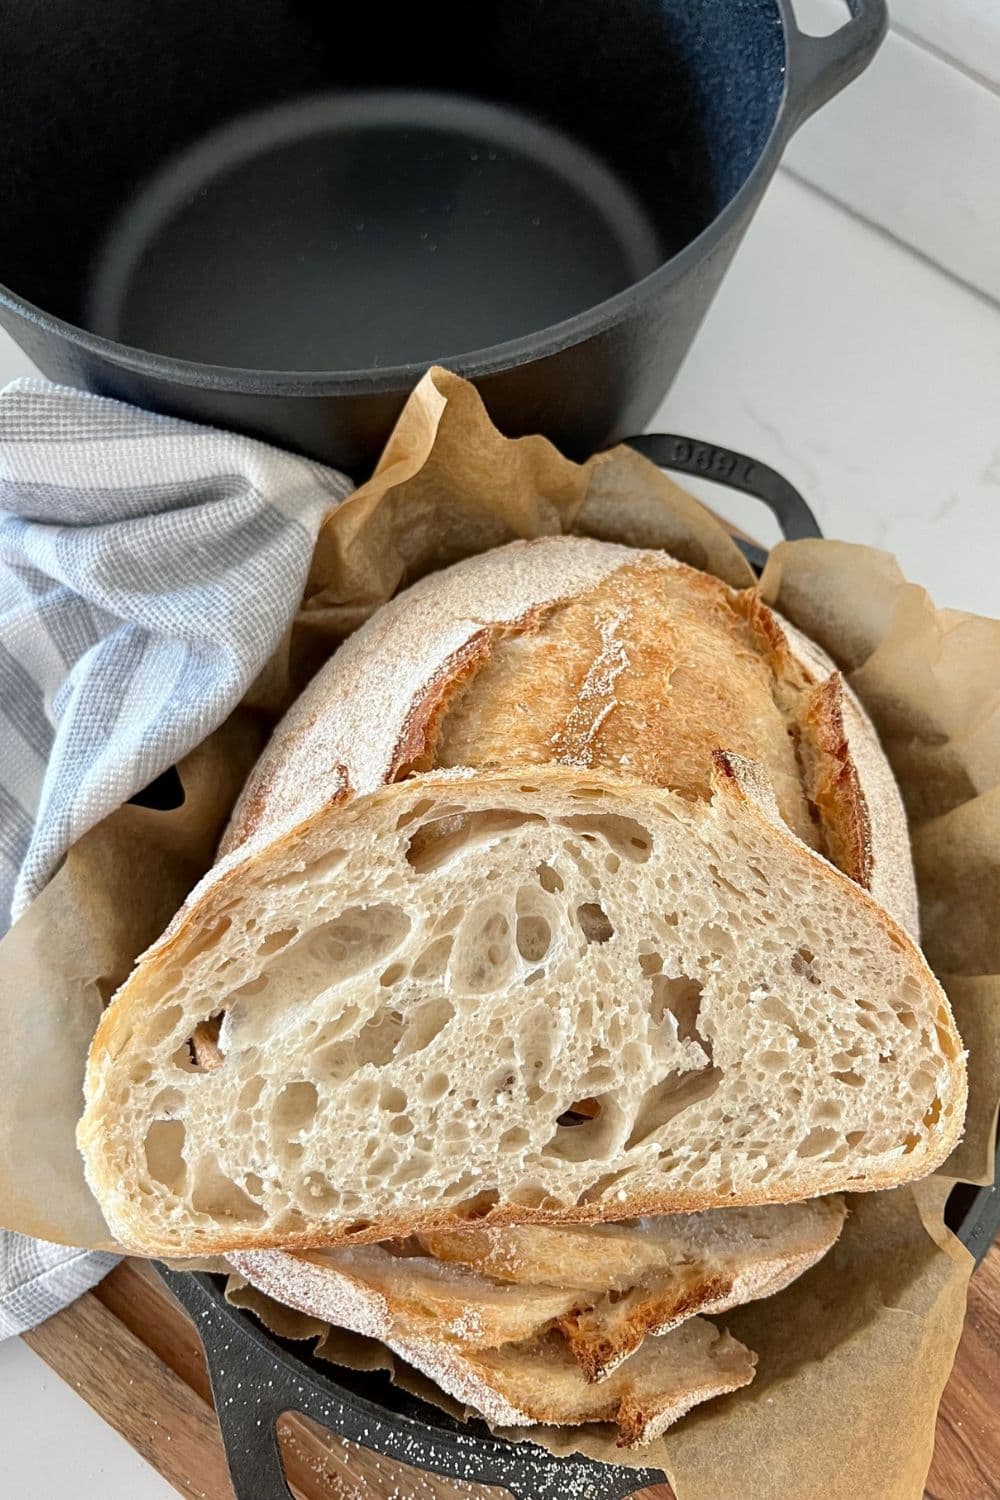
Before I invested in a good Dutch oven, my sourdough attempts were… inconsistent, to put it mildly. Flat loaves were common, and achieving a deep, dark crust felt impossible. I tried everything – different flours, starter feedings, even preheating the oven for an hour. Nothing seemed to consistently work. Then, I took the plunge and got a Lodge Dutch oven, and things changed dramatically. The steam trapped inside creates a beautiful, blistered crust, and the even heat distribution ensures a perfectly baked interior.
The science behind it is simple. Sourdough benefits from a steamy environment during the initial bake. Steam delays crust formation, allowing the loaf to fully expand before setting. This results in a lighter, airier crumb. A Dutch oven traps this steam, creating its own little proofing chamber. Without a Dutch oven, you’re fighting against the steam escaping and a drier environment, which leads to a tougher crust and less rise. It really is a game changer.
If you try to bake sourdough without a Dutch oven, you’ll likely end up with a loaf that lacks oven spring – that dramatic rise in the oven. The crust will be pale and potentially tough, and the crumb may be dense. While it's possible to create steam in a conventional oven using various methods (like pouring water into a hot pan), it's much less effective and consistent than using a Dutch oven. You’re essentially trying to recreate the environment a Dutch oven provides naturally.
Key Dutch Oven Features for Sourdough Success
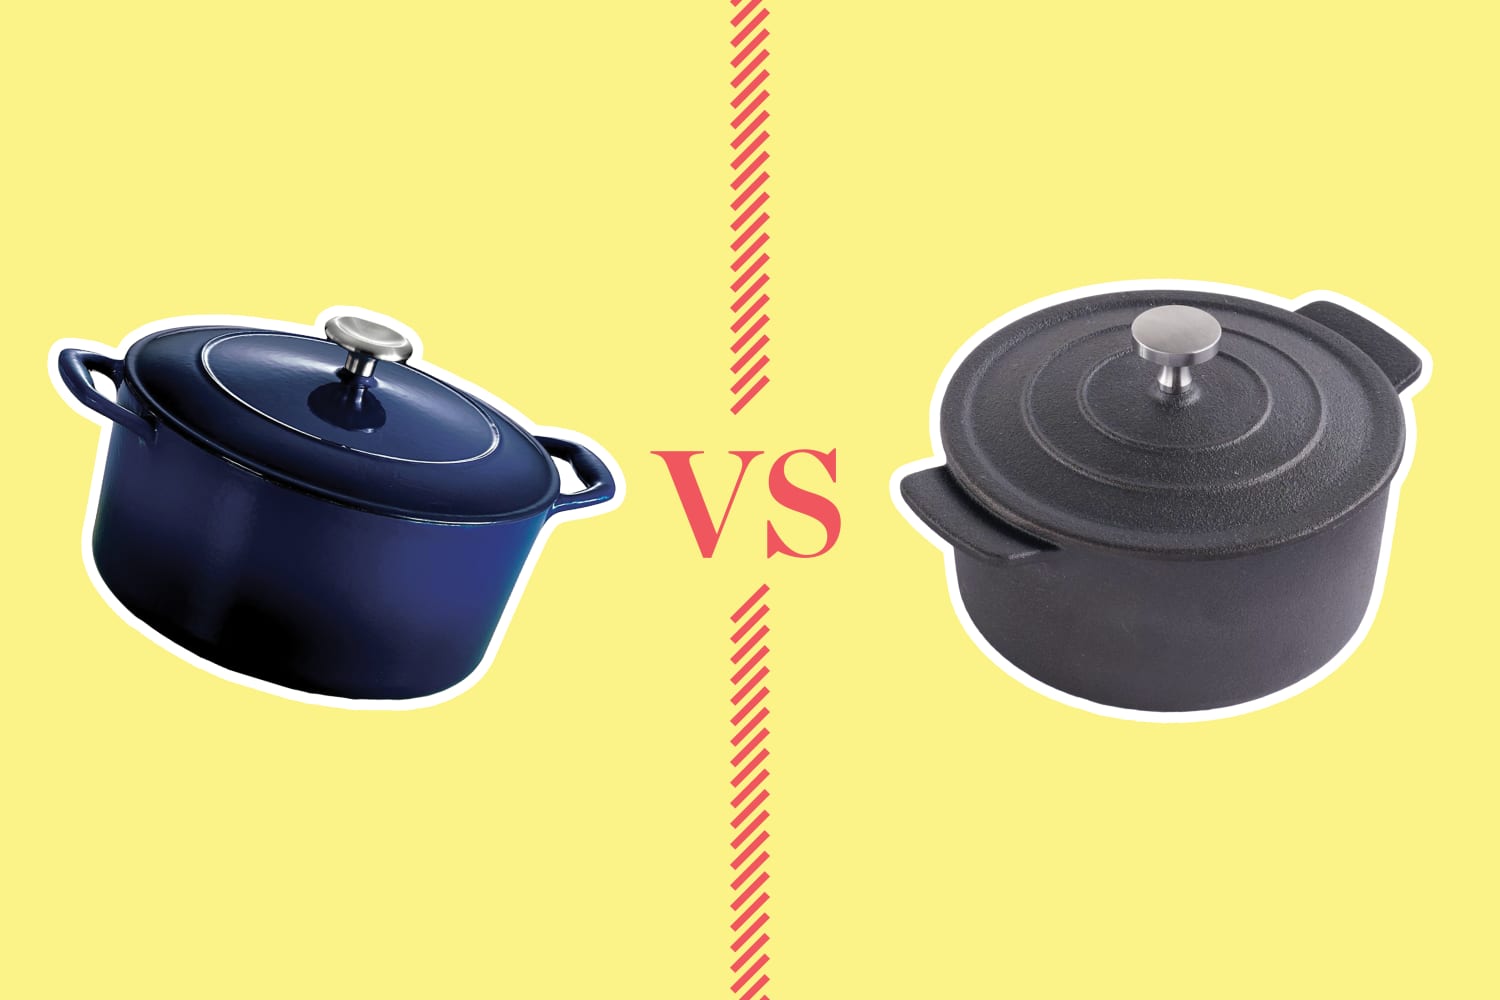
Choosing the right Dutch oven can feel overwhelming. There are so many options available, and not all of them are created equal. The first big decision is enameled cast iron versus bare cast iron. Enameled Dutch ovens are coated with a porcelain enamel, making them non-reactive and easier to clean. Bare cast iron requires seasoning to prevent rust and can impart a slight metallic taste if not properly maintained. For beginners, I generally recommend enameled – it’s more forgiving.
Bare cast iron, however, has its advantages. It heats up faster and can withstand higher temperatures. Some bakers prefer this for achieving a super-crisp crust. It’s also typically less expensive. But it requires more maintenance. The choice really comes down to personal preference and how much effort you’re willing to put into care. I’ve used both successfully, but enameled is my daily driver.
The lid needs to fit tight to keep steam in. If the seal is loose, your crust won't blister. Check the knob material—plastic melts at 450°F, so I use stainless steel or cast iron. Thicker walls hold heat better, which prevents the oven temperature from crashing when you drop the cold dough in. A 5-7 quart pot fits a standard 800g loaf without crowding it.
Don’t get caught up in unnecessary features. Fancy designs or ornate handles don’t impact baking performance. Focus on the core elements – material, lid fit, knob material, and capacity. A heavy Dutch oven will perform better, but weight isn’t everything. A well-made, moderately weighted Dutch oven will still deliver excellent results. Don't spend extra money on things that won't improve your bread.
- Tight-fitting lid: Minimizes steam escape.
- Metal knob: Prevents melting at high temperatures.
- Thick walls: Ensures even heat distribution.
- 5-7 quart capacity: Ideal for most sourdough loaves.
Dutch Oven Comparison for Sourdough Bread Baking
| Feature | Enameled Cast Iron | Bare Cast Iron |
|---|---|---|
| Heat Retention | Excellent, maintains consistent temperature for even baking. | Excellent, known for superior heat retention and distribution. |
| Reactivity | Non-reactive surface; doesn't interact with the dough's acidity. | Can react with the acidity of sourdough, potentially affecting flavor and requiring more thorough seasoning. |
| Maintenance | Easier to clean; food releases more readily due to the enamel coating. | Requires regular seasoning to prevent rust and sticking; more involved cleaning process. |
| Cost | Generally more expensive upfront due to the enamel coating process. | Typically more affordable initially, though quality bare cast iron can still be a significant investment. |
| Weight | Generally heavier than bare cast iron of similar size, due to the enamel layer. | Typically lighter than enameled, but still substantial. |
| Flavor Development | Minimal impact on flavor; provides a neutral baking environment. | Some bakers believe bare cast iron imparts a subtle, desirable flavor to the crust. |
| Crust Formation | Produces a crisp crust with good oven spring, but may require slightly longer baking times. | Known for creating exceptionally crisp and dark crusts due to its heat properties. |
Qualitative comparison based on the article research brief. Confirm current product details in the official docs before making implementation choices.
Top 6 Dutch Ovens for Sourdough in 2026
I've baked with most of these over the last five years. Here is how they actually handle high-heat bread baking. Prices are approximate as of late 2025 and can vary.
Le Creuset 5.5-Quart Round Dutch Oven ($380): The gold standard. Le Creuset is known for its quality and durability. The enamel is exceptionally smooth, making it easy to clean. It heats evenly and retains heat beautifully. Sourdough Score: 9.5/10. The price is the biggest drawback.
Staub 5.5-Quart Round Dutch Oven ($350): A close competitor to Le Creuset. Staub’s "black matte’ enamel interior is specifically designed for browning and searing. It also has a tight-fitting lid. Sourdough Score: 9/10. Some users find Staub"s enamel a bit more prone to chipping over time.
Lodge 6-Quart Enameled Cast Iron Dutch Oven ($80): The best value option. Lodge offers excellent quality at a fraction of the price of Le Creuset or Staub. It’s a workhorse and performs very well for sourdough. Sourdough Score: 8/10. The enamel isn’t quite as refined as the higher-end brands.
Cuisinart 7-Quart Chef’s Classic Enameled Cast Iron Dutch Oven ($120): A great mid-range option. Cuisinart provides a solid Dutch oven with good heat retention and a tight-fitting lid. Sourdough Score: 7.5/10. It’s a bit larger than the 5.5-quart options, which might be preferable for larger loaves.
Great Jones Dutchess 6.75-Quart Dutch Oven ($160): A stylish and functional option. Great Jones has gained popularity for its aesthetically pleasing cookware. It performs well and comes in a variety of colors. Sourdough Score: 7/10. It's a newer brand, so long-term durability is still being evaluated.
Amazon Basics 6-Quart Enameled Cast Iron Dutch Oven ($60): The most affordable option. While it won't match the performance of Le Creuset, it's a surprisingly capable Dutch oven for the price. Sourdough Score: 6.5/10. Expect some inconsistencies in enamel quality.
- Where to Buy: All of these are readily available on Amazon, directly from the manufacturer’s website, and at many kitchen supply stores.
- Important Note: Prices can fluctuate. Check multiple retailers for the best deals.
Our Top Picks: The Best Dutch Ovens for Sourdough Bread
Excellent heat retention and distribution · Durable, chip-resistant enamel coating · Oven safe to 500°F (260°C)
This iconic Dutch oven provides unparalleled heat retention for a consistently crisp sourdough crust.
Unique interior matte black enamel for superior browning · Self-basting spikes on the lid for moist results · Heavy-duty cast iron construction
The Staub's innovative lid design ensures optimal moisture for a beautifully risen and tender sourdough loaf.
Generous 6-quart capacity · Smooth enamel finish for easy cleaning · Excellent value for money
A fantastic budget-friendly option that still delivers excellent heat retention for baking artisan bread.
Large 7-quart capacity, perfect for bigger loaves · Even heat distribution for consistent baking · Drip-free pouring rim
This spacious Dutch oven is ideal for baking larger sourdough loaves with a perfectly browned crust.
Heavy-gauge cast iron for superior heat retention · Non-reactive enamel interior · Modern, ergonomic design
The Misen Dutch oven offers a great balance of performance and modern aesthetics for your sourdough baking.
As an Amazon Associate I earn from qualifying purchases. Prices may vary.
Beyond the Oven: Essential Sourdough Tools
The pot is the heavy lifter, but you'll struggle without a few smaller tools. A lame (pronounced "lahm") is a bread scoring tool – a very sharp blade used to make precise cuts on the surface of the dough. This controls the expansion during baking and creates beautiful designs. I recommend a Gilmour lame.
A dough scraper is invaluable for handling sticky dough. It helps you lift and divide the dough without it sticking to your hands or the counter. A banneton (proofing basket) provides support for the dough during its final proof, helping it maintain its shape. While bannetons are helpful, you can also proof in a bowl lined with a floured cloth. It’s not essential, but it definitely makes shaping easier.
Dutch oven liners (parchment paper circles or silicone mats) prevent sticking and make it easier to transfer the loaf into and out of the Dutch oven. I prefer parchment paper for its simplicity. Don’t forget oven mitts – a good pair is essential for safely handling the hot Dutch oven. I recommend insulated silicone mitts.
Finally, a kitchen scale is non-negotiable. Sourdough baking is precise, and accurate measurements are crucial for consistent results. I use a digital scale that measures in grams.
- Gilmour Lame: Excellent for precise scoring.
- Dough Scraper: Makes handling sticky dough a breeze.
- Banneton: Provides support during proofing.
- Parchment Paper Liners: Prevents sticking.
- Digital Kitchen Scale: Essential for accurate measurements.
Essential Sourdough Tools
- Dutch Oven - The cornerstone of sourdough baking! Look for heavy cast iron with a tight-fitting lid. Lodge is a classic, reliable choice. Lodge Cast Iron offers a variety of sizes.
- Kitchen Scale - Precision is key in sourdough. Measuring by weight, not volume, ensures consistent results. We recommend the Escali Primo Digital Kitchen Scale for its accuracy and ease of use.
- Bench Scraper - For dividing dough, cleaning your work surface, and lifting dough without sticking. A simple, invaluable tool. King Arthur Baking's Bench Scraper is a popular option.
- Proofing Basket (Banneton) - Provides support for the dough during its final rise and creates a beautiful spiral pattern. Jim Lahey at Sullivan Street Bakery popularized these! Find quality baskets at Breadtopia.
- Lame - A sharp blade used to score the dough before baking, controlling expansion and creating artistic designs. A Workman Bread Lame is a safe and effective choice.
- Parchment Paper - Makes transferring the dough to the hot Dutch oven *much* easier. Look for unbleached parchment. IFBax Parchment Paper is a well-regarded brand.
- Oven Mitts (High Heat) - Handling a scorching hot Dutch oven requires serious protection! Look for silicone oven mitts rated for high temperatures. Williams Sonoma Silicone Oven Mitts are a good investment.
Troubleshooting Common Sourdough Dutch Oven Issues
Even with the best equipment, things can go wrong. Burnt bottoms are often caused by the Dutch oven being too close to the heating element. Try moving the oven rack up a level. Pale crusts can result from insufficient steam. Ensure your lid is tightly sealed and consider increasing the baking temperature slightly.
Loaves sticking to the Dutch oven are usually caused by insufficient lining. Always use parchment paper or a silicone mat. Condensation issues (excessive moisture on the lid) are normal, but if it’s excessive, it could indicate the oven isn’t fully preheated. Lid sticking can happen as the Dutch oven cools. Let it cool completely before attempting to remove the lid.
Proper cleaning and seasoning are vital for maintaining your Dutch oven. Avoid harsh detergents, as they can damage the enamel. For enameled Dutch ovens, simply wash with warm water and a soft sponge. For bare cast iron, scrub gently, dry thoroughly, and season with a thin layer of oil after each use. Avoid soaking cast iron in water for extended periods.
If you encounter persistent issues, don’t be afraid to experiment. Adjust the baking temperature, proofing time, or hydration level of your dough. Sourdough baking is a learning process, and every oven is slightly different. Keep notes on your adjustments and results to refine your technique.
- Burnt Bottom: Move oven rack up a level.
- Pale Crust: Ensure tight lid seal, increase temperature.
- Sticking: Use parchment paper or silicone mat.
- Condensation: Ensure oven is fully preheated.
Sourdough Recipe to Test Your New Dutch Oven
Let’s put your new Dutch oven to the test with a simple, reliable sourdough recipe. This recipe yields a beautiful, flavorful loaf with a crispy crust. It assumes you have an active sourdough starter.
Ingredients: 400g bread flour, 300g water, 100g sourdough starter (100% hydration), 8g salt. Instructions: 1. Autolyse: Mix flour and water in a bowl and let rest for 30 minutes. 2. Add Starter & Salt: Add starter and salt to the dough and mix thoroughly. 3. Bulk Fermentation: Let the dough rest for 4-6 hours, performing stretch and folds every 30-60 minutes for the first 2-3 hours. 4. Shape: Gently shape the dough into a round or oval. 5. Proof: Place the shaped dough in a floured banneton or bowl lined with a floured cloth and proof in the refrigerator for 12-24 hours.
6. Preheat: Preheat your Dutch oven (with the lid on) in the oven at 450°F (232°C) for at least 30 minutes. 7. Bake: Carefully remove the hot Dutch oven from the oven. Place the dough in the Dutch oven (using parchment paper). Score the top of the dough with a lame. 8. Cover & Bake: Cover the Dutch oven and bake for 20 minutes. 9. Uncover & Bake: Remove the lid and bake for another 25-30 minutes, or until the crust is deeply golden brown.
10. Cool: Let the loaf cool completely on a wire rack before slicing and enjoying. Tips: Adjust the hydration level based on your flour. If the dough is too sticky, reduce the water slightly. If it’s too dry, add a little more water. Experiment with different scoring patterns to create unique designs. Don't skip the long, cold proof – it develops flavor.
Where to Find the Best Deals on Dutch Ovens
Dutch ovens can be a significant investment. Fortunately, there are ways to save money. Keep an eye out for seasonal sales, particularly around holidays like Black Friday and Cyber Monday. Outlet stores often carry discounted Dutch ovens, sometimes with minor cosmetic imperfections.
Refurbished options can also be a good value, but be sure to check the seller’s return policy. Websites like Brad’s Deals and Slickdeals track prices and alert you to discounts. Don’t be afraid to buy used, but inspect the Dutch oven carefully for cracks or damage before purchasing.
Consider checking stores like HomeGoods and TJ Maxx – they sometimes have surprising deals on high-quality cookware. Remember to factor in shipping costs when comparing prices online. A little bit of research can save you a significant amount of money.
Top Dutch Ovens for Sourdough – A Comparison
| Brand & Model | Capacity | Material & Construction | Key Features for Sourdough | Typical User Feedback |
|---|---|---|---|---|
| Le Creuset Round Dutch Oven | 5.5 Quart | Enameled Cast Iron | Excellent heat retention & distribution; tight-fitting lid for steam; durable enamel resists sticking. | Highly rated for consistent results, but considered a premium investment. |
| Lodge Enameled Cast Iron Dutch Oven | 6 Quart | Enameled Cast Iron | Good heat retention; affordable price point; versatile for various cooking methods. | Generally well-received, some users report enamel chipping with heavy use. |
| Staub Round Cocotte | 5.5 Quart | Enameled Cast Iron | Black matte enamel interior promotes browning; heavy lid creates excellent steam; durable construction. | Praised for exceptional browning and crust development, often favored by experienced bakers. |
| Cuisinart Chef's Classic Enameled Cast Iron Dutch Oven | 7 Quart | Enameled Cast Iron | Large capacity; even heating; compatible with various cooktops. | Good value for the size, but may not retain heat *quite* as well as premium brands. |
| Amazon Basics Enameled Cast Iron Dutch Oven | 6 Quart | Enameled Cast Iron | Budget-friendly option; decent heat distribution; suitable for beginners. | A solid entry-level choice, though durability may be lower than more expensive options. |
| Great Jones Dutch Oven | 6.75 Quart | Enameled Cast Iron | Stylish design; generous capacity; designed for even heating. | Popular for its aesthetic appeal and performance, often compared favorably to Le Creuset. |
Qualitative comparison based on the article research brief. Confirm current product details in the official docs before making implementation choices.
No comments yet. Be the first to share your thoughts!