
Sunday Meal Prep: Why Dutch Ovens Rule
Sunday afternoons are often envisioned as a time for relaxation, not meal-prep stress. The reality, however, can be a frantic scramble to get lunches packed and dinners planned for the week ahead. Rediscovering a Dutch oven can simplify this process.
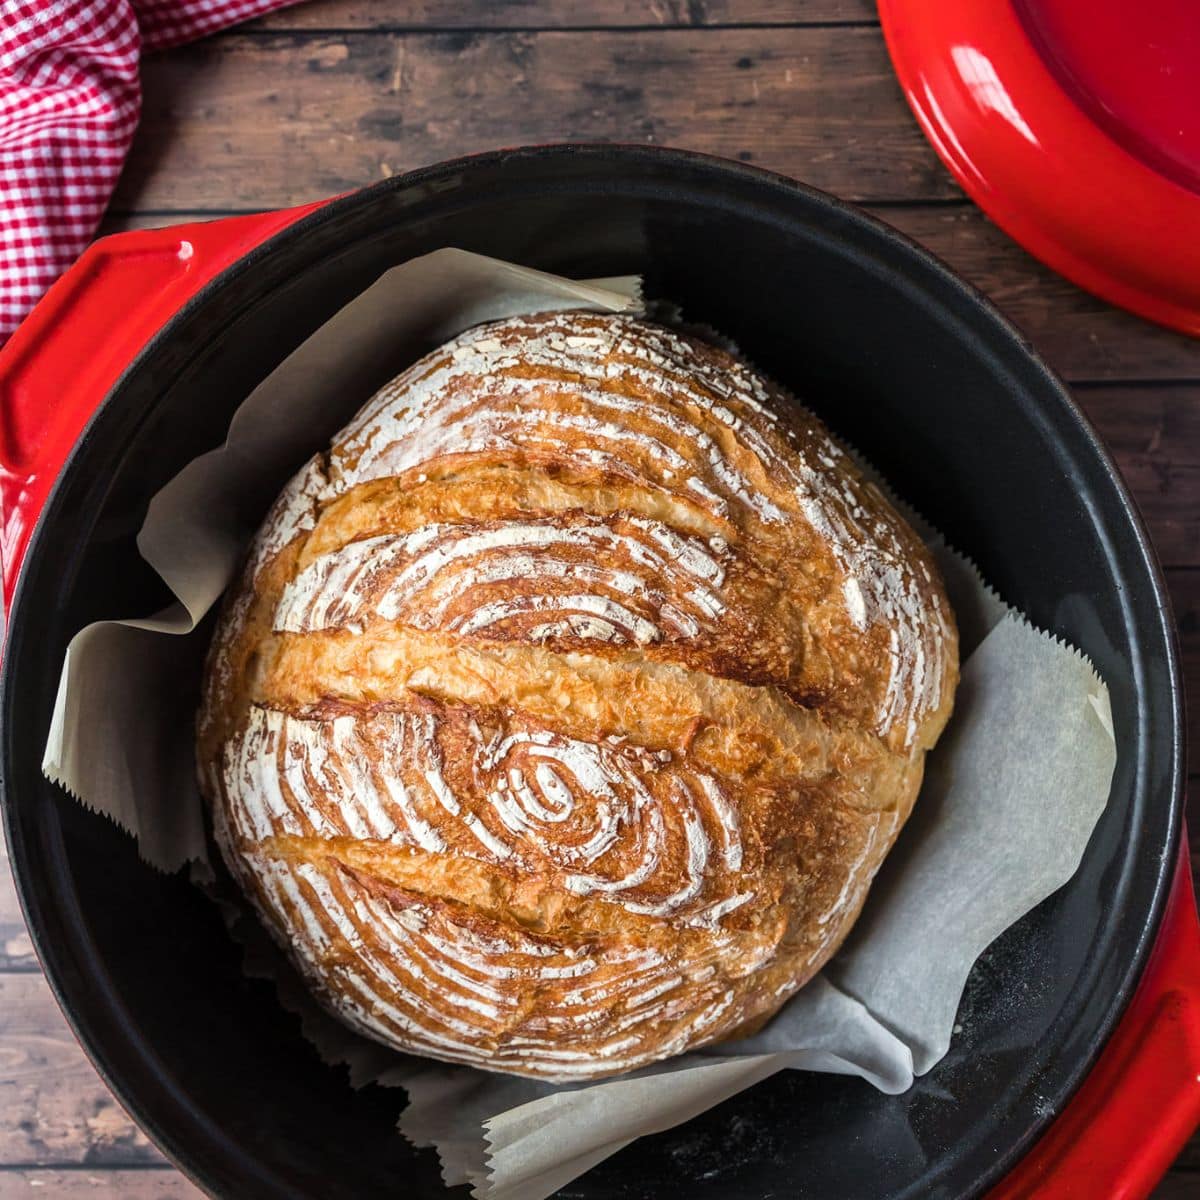
A Dutch oven simplifies meal prep. Its thick walls distribute heat evenly, making it suitable for braised stews and roasted chickens. As a one-pot cooking vessel, it reduces dishes and fuss, freeing up time.
There's a growing desire for simpler, intentional eating. People are focusing on wholesome, home-cooked meals and batch cooking. The Dutch oven is well-suited for this trend, acting as a time-saver and stress-reliever.
Its versatility allows searing meat before adding vegetables and broth for stews, or building layers for pasta bakes. This investment in a Dutch oven pays off in time and flavor.
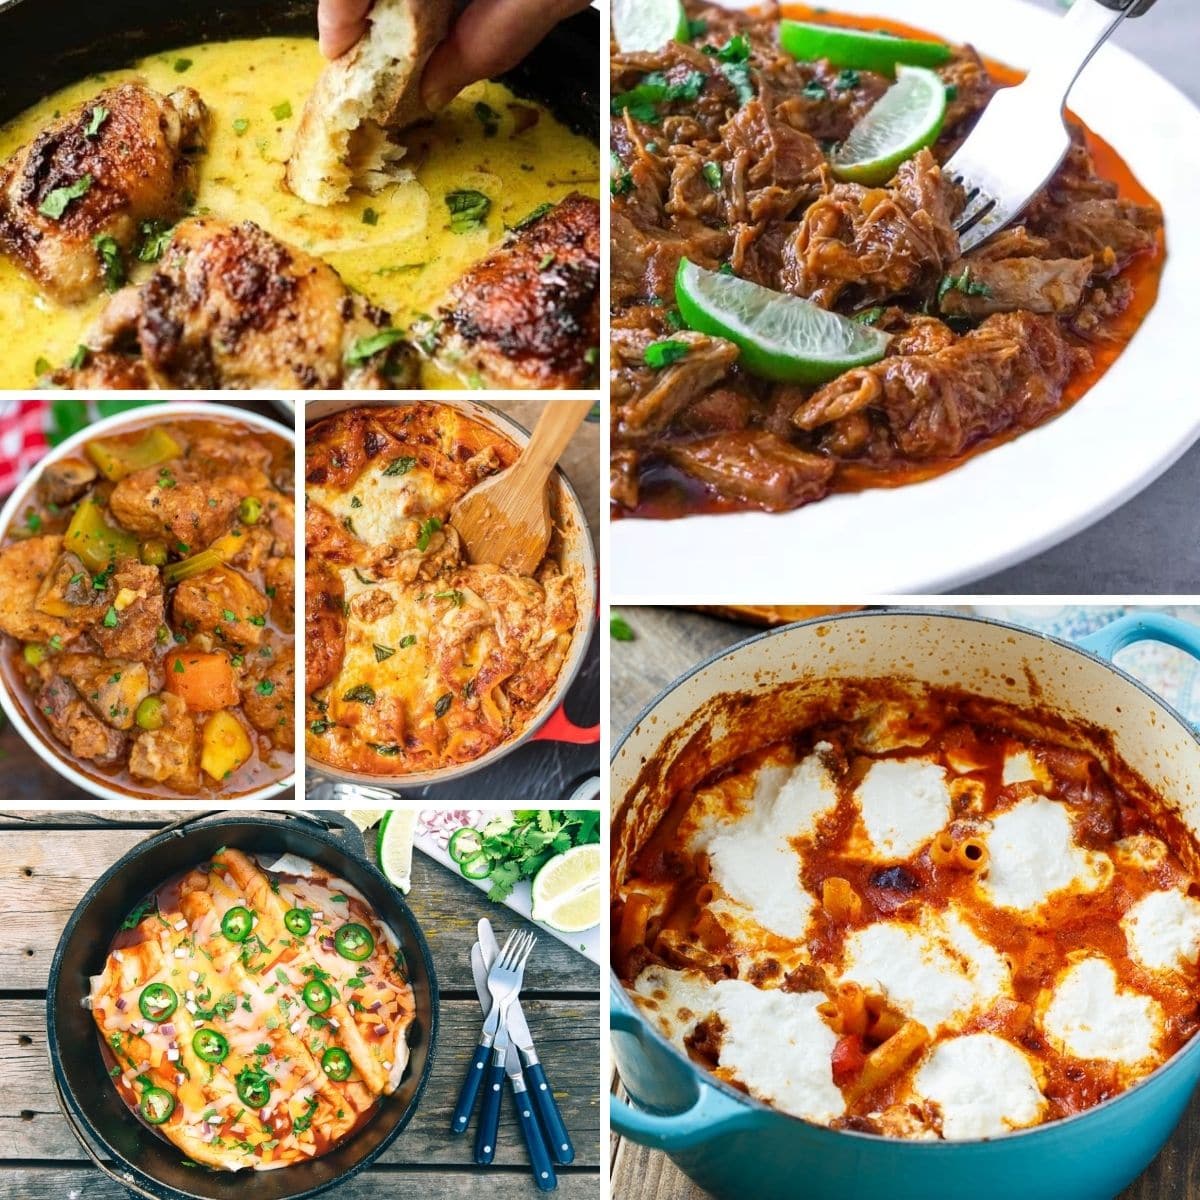
15 One-Pot Wonders for 2026
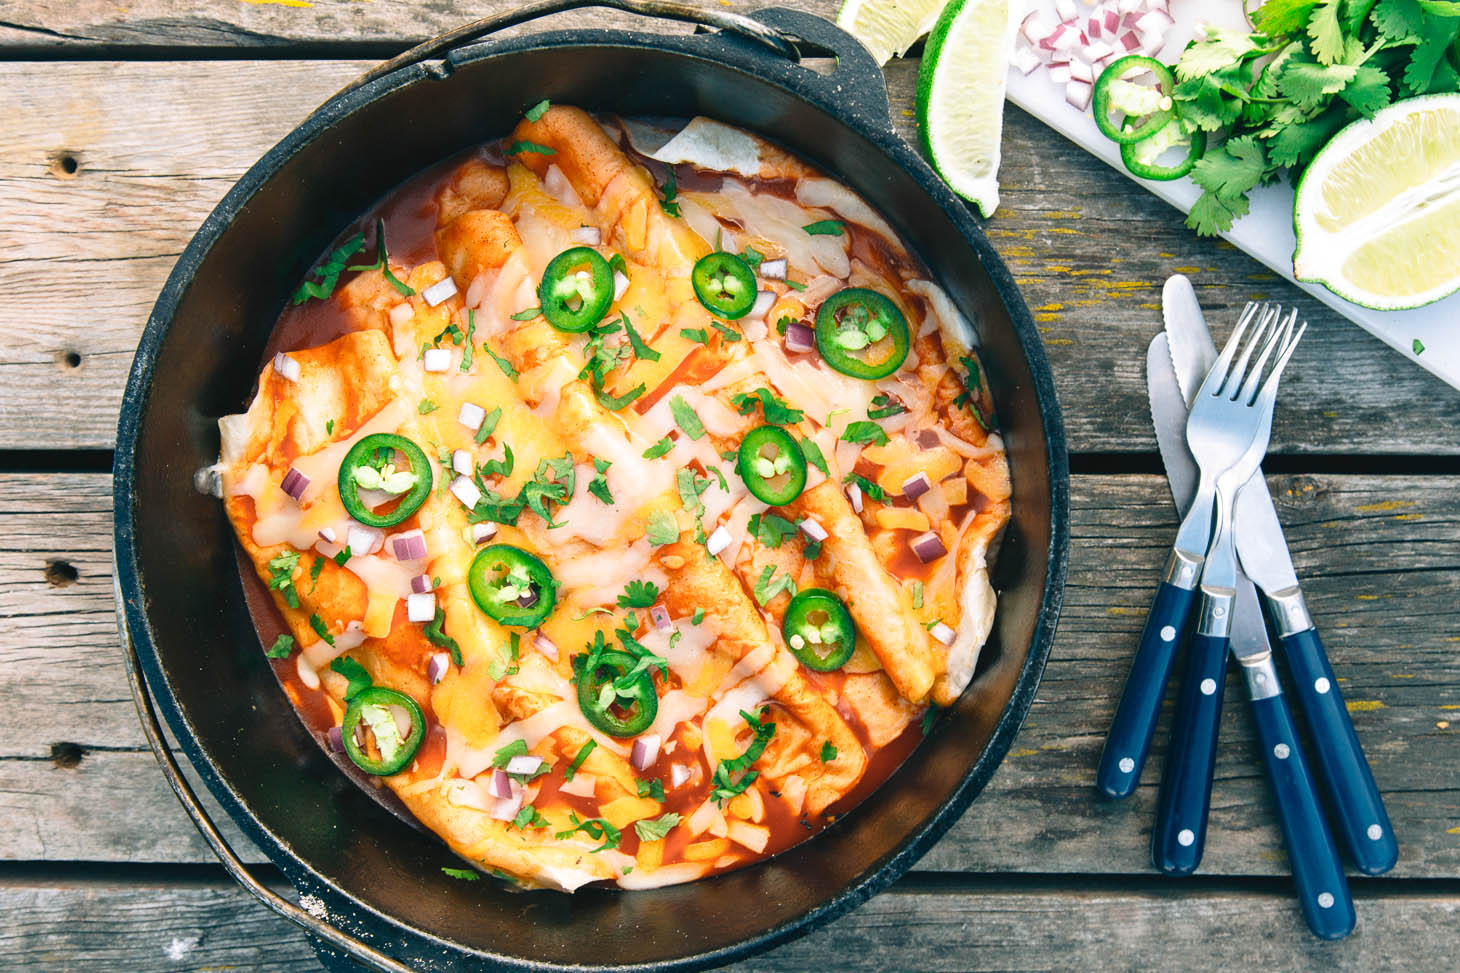
Here are 15 Dutch oven recipes designed for easy meal prep. These recipes are flavorful, satisfying, reheat well, and simplify weeknights. They are relatively hands-off and can be scaled up.
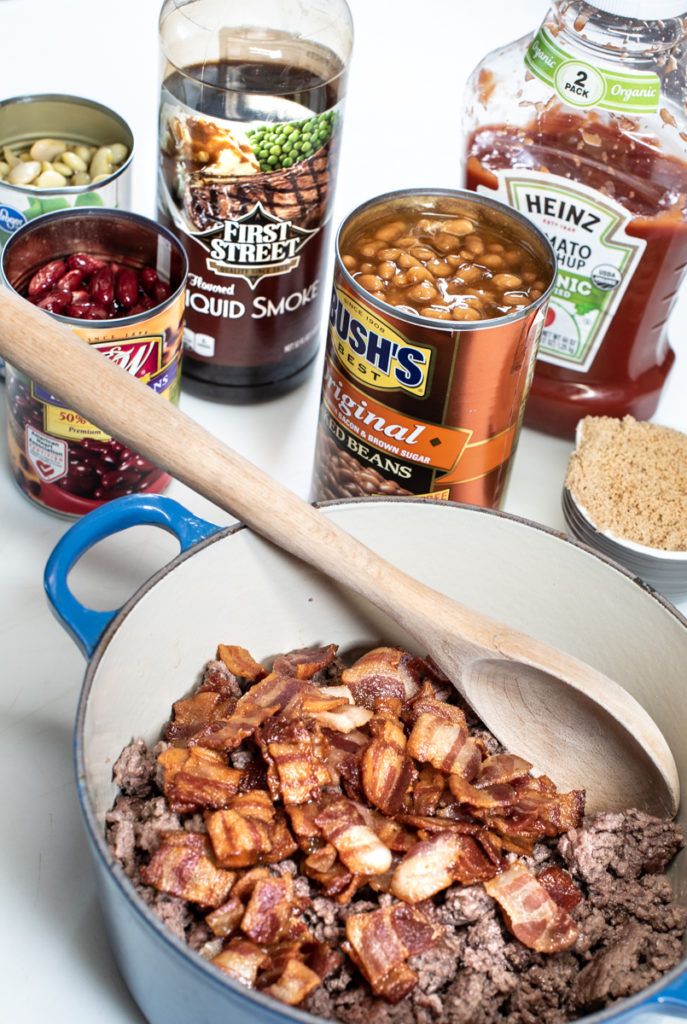
- Classic Beef Chili: A hearty, flavorful chili is a meal prep staple. It freezes incredibly well and is always a crowd-pleaser. Prep/Cook Time: 20 minutes prep, 2-3 hours simmer. [Link to My Dutch Oven Recipe]
- Lemon Herb Roasted Chicken and Veggies: Roast a whole chicken and your favorite root vegetables in the Dutch oven for a complete meal. Leftovers are perfect for sandwiches or salads. Prep/Cook Time: 20 minutes prep, 1.5-2 hours roast. [Link to My Dutch Oven Recipe]
- Creamy Tomato Soup: A comforting classic that’s perfect for chilly evenings. This soup reheats beautifully and is a great base for adding grilled cheese croutons. Prep/Cook Time: 15 minutes prep, 45 minutes cook. [Link to My Dutch Oven Recipe]
- Sausage and White Bean Stew: A rustic and flavorful stew that’s packed with protein and fiber. It’s a one-pot wonder that’s ready in under an hour. Prep/Cook Time: 10 minutes prep, 50 minutes cook. [Link to My Dutch Oven Recipe]
- Pasta e Fagioli: This Italian pasta and bean soup is hearty, flavorful, and surprisingly easy to make in a Dutch oven. It’s a great way to use up leftover vegetables. Prep/Cook Time: 15 minutes prep, 40 minutes cook. [Link to My Dutch Oven Recipe]
- Braised Short Ribs with Root Vegetables: A more luxurious option for a special meal prep day. The short ribs become incredibly tender when braised in the Dutch oven. Prep/Cook Time: 20 minutes prep, 3-4 hours braise. [Link to My Dutch Oven Recipe]
- Cuban Black Beans: A flavorful and versatile side dish or main course. These beans are delicious with rice, plantains, and a side of salsa. Prep/Cook Time: 10 minutes prep, 2-3 hours simmer. [Link to My Dutch Oven Recipe]
- Chicken and Dumplings: A comforting classic that’s perfect for a cold day. The Dutch oven helps create tender, fluffy dumplings. Prep/Cook Time: 20 minutes prep, 1 hour cook. [Link to My Dutch Oven Recipe]
- Shepherd’s Pie: A hearty and satisfying meal that’s perfect for meal prep. Layer seasoned ground meat with vegetables and top with mashed potatoes. Prep/Cook Time: 30 minutes prep, 45 minutes cook. [Link to My Dutch Oven Recipe]
- Breakfast Casserole: Prep a hearty breakfast casserole on Sunday and enjoy it all week long. Customize it with your favorite ingredients, like sausage, bacon, and cheese. Prep/Cook Time: 15 minutes prep, 40 minutes cook. [Link to My Dutch Oven Recipe]
- Moroccan Tagine with Chicken and Apricots: A fragrant and flavorful tagine that’s perfect for a taste of Morocco. The Dutch oven helps keep the chicken moist and tender. Prep/Cook Time: 20 minutes prep, 1.5-2 hours simmer. [Link to My Dutch Oven Recipe]
- Spanish Chickpea and Spinach Stew: A vibrant and healthy stew that’s packed with flavor. It’s a great vegetarian option for meal prep. Prep/Cook Time: 15 minutes prep, 45 minutes cook. [Link to My Dutch Oven Recipe]
- Lentil Soup with Smoked Sausage: A hearty and flavorful soup that’s packed with protein and fiber. The smoked sausage adds a delicious smoky flavor. Prep/Cook Time: 15 minutes prep, 50 minutes cook. [Link to My Dutch Oven Recipe]
- Pulled Pork: Slow cook a pork shoulder in the Dutch oven until it’s fall-apart tender. Shred the pork and use it for tacos, sandwiches, or sliders. Prep/Cook Time: 15 minutes prep, 6-8 hours cook. [Link to My Dutch Oven Recipe]
- Italian Wedding Soup: A classic Italian soup with meatballs, pasta, and spinach. It’s a comforting and satisfying meal that’s perfect for a cold day. Prep/Cook Time: 30 minutes prep, 1 hour cook. [Link to My Dutch Oven Recipe]
15 One-Pot Dutch Oven Recipes for Meal Prep Sundays
| Recipe Name | Cuisine | Dietary Notes | Prep Time | Cook Time | Reheat/Freeze Suitability |
|---|---|---|---|---|---|
| Roast Chicken & Root Vegetables | American | Gluten-Free | 20 minutes | 2-3 hours | Yes |
| Beef Stew | Irish | Dairy-Free option | 25 minutes | 3-4 hours | Yes |
| Italian Sausage & White Bean Soup | Italian | Gluten-Free | 15 minutes | 45 minutes | Yes |
| Chicken and Dumplings | Southern US | None | 20 minutes | 1 hour 30 minutes | Partial - Dumplings best fresh |
| Chili | Tex-Mex | Vegetarian option | 20 minutes | 60 minutes | Yes |
| Pot Roast | American | Gluten-Free | 20 minutes | 3-4 hours | Yes |
| French Onion Soup | French | Vegetarian | 30 minutes | 1 hour | Partial - Best fresh, can reheat |
| Lentil Soup | Mediterranean | Vegetarian, Vegan, Gluten-Free | 15 minutes | 45 minutes | Yes |
Illustrative comparison based on the article research brief. Verify current pricing, limits, and product details in the official docs before relying on it.
Beyond the Basics: Dutch Oven Techniques
Effective Dutch oven use involves specific techniques. Searing meat before adding liquids develops a rich crust and complex flavors through the Maillard reaction.
Braising involves searing meat, then simmering it in liquid. The Dutch oven's tight-fitting lid traps moisture for tender results. Experiment with braising liquids like wine, beer, broth, or tomato juice.
Simmering develops deep flavors in soups and stews. Maintain a gentle simmer to prevent ingredients from becoming tough. Deglaze the pot after searing by adding liquid and scraping up browned bits from the bottom to capture flavor.
Stovetop cooking is suitable for searing and simmering, while the oven is ideal for long braises and roasts. Cast iron retains heat well, so adjust cooking times. Always use oven mitts when handling a hot Dutch oven.
Scaling Recipes: Batch Cooking Math
Scaling recipes to feed more people is straightforward. The key is maintaining flavor balance. Multiplying all ingredients by a set factor is a common approach.
Increasing volume affects cooking time. Larger quantities take longer to heat through. Increase cooking time by 25-50% when doubling a recipe. Add extra liquid if needed to prevent drying.
To scale a recipe, multiply ingredient quantities by a scaling factor: double (x2), 1.5x (50% increase), or 1.25x (25% increase). For instance, 1 cup of broth becomes 2 cups when doubling. Adjust seasoning to taste after scaling.
- Simple Scaling Formula: Ingredient Quantity x Scaling Factor = New Ingredient Quantity
- Scaling Factors: Double (x2), 1.5x, 1.25x (25% increase)
Storage Solutions: Keeping it Fresh
You’ve spent your Sunday prepping delicious meals, now you need to store them properly to ensure they stay fresh and safe to eat. The right storage containers are essential. Glass containers are a great option—they’re non-reactive, easy to clean, and don’t absorb odors. Plastic containers are lighter and more affordable, but choose BPA-free options.
Stainless steel containers are another good choice, especially for longer-term storage. Allow food to cool completely before refrigerating or freezing to prevent condensation and bacterial growth. Portion meals into individual containers for easy access and portion control.
Properly stored cooked food lasts 3-4 days in the refrigerator. Freeze meals for longer storage, typically 2-3 months. Label containers with the date and contents. Food safety guidelines are available at foodsafety.gov.
Dutch Oven Care: Keeping it Happy
A well-cared-for Dutch oven can last a lifetime. Care routines differ for enameled and bare cast iron. Enameled cast iron is low-maintenance; wash with warm, soapy water and a soft sponge, avoiding abrasive cleaners that can damage the enamel.
Bare cast iron requires more attention. Wash with warm water and a soft brush after each use, avoiding soap to preserve seasoning. Dry thoroughly and lightly oil to prevent rust. Remove rust with steel wool and re-season.
Store your Dutch oven in a dry place. To prevent scratching, place a paper towel between the lid and pot if the lid has a cast iron knob.
- Enameled Cast Iron: Wash with warm, soapy water and a soft sponge. Avoid abrasive cleaners.
- Bare Cast Iron: Wash with warm water and a soft brush. Dry thoroughly and lightly oil.
- Rust Removal: Scrub with steel wool and re-season.
Recipe Standouts: My Top 3 Picks
The Classic Beef Chili, Braised Short Ribs with Root Vegetables, and Sausage and White Bean Stew are three standout recipes for meal prep.
The chili is versatile, freezes well, and is a good way to use leftover vegetables. Braised Short Ribs offer an indulgent meal; the meat becomes tender and flavorful with a longer cooking time.
The Sausage and White Bean Stew is a quick and easy meal prep option, packed with protein and fiber, and ready in under an hour. These three recipes showcase flavor, convenience, and versatility in Dutch oven meal prep.
Community Favorites: What Others Are Cooking
It’s not just me who’s obsessed with Dutch oven meal prep! A quick search on social media reveals a thriving community of home cooks sharing their creations. On Reddit, user u/KitchenWizard87 recently posted a photo of their Dutch oven Shepherd’s Pie, calling it a "lifesaver" for busy weeknights.
Over on Twitter, @HomeCookHarmony shared a recipe for Dutch oven chicken and dumplings, praising its simplicity and deliciousness. It seems like everyone is discovering the magic of one-pot cooking. This community aspect is one of the things I love most about Dutch oven cooking – it connects us to a long tradition of home-cooked meals and shared experiences.
No comments yet. Be the first to share your thoughts!