
Make the recipe
A dutch oven turns simple ingredients into a meal that tastes like it took all day. The thick walls hold heat steady, and the tight lid traps moisture so meat falls apart without drying out. This recipe for a rustic beef stew works in any 5.5 to 6-quart enameled cast iron pot. It relies on a few key steps: searing the meat hard, building a rich broth, and low, slow simmering.
The stew is forgiving. You can swap root vegetables or change the herbs based on what you have in the fridge. The goal is a deep, savory flavor with tender chunks of beef and vegetables that hold their shape. Serve it with crusty bread or over mashed potatoes to soak up the sauce.
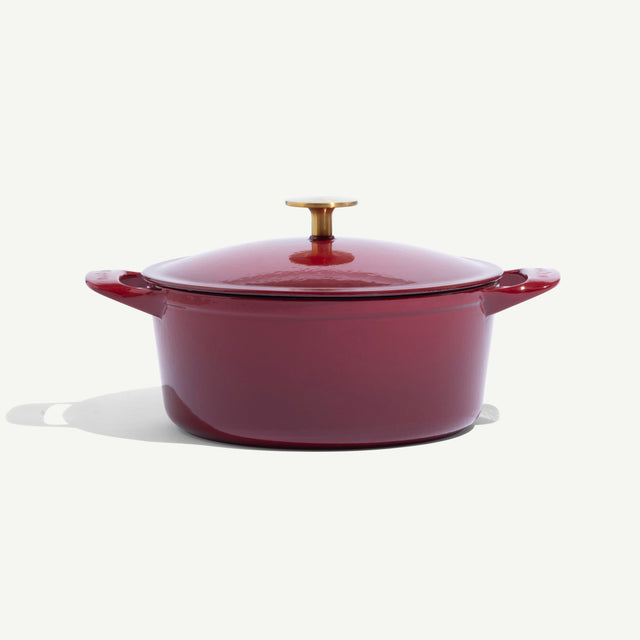
The secret to a great stew is the sear. Do not crowd the pot when browning the meat, or it will steam instead of brown. Working in batches ensures a deep Maillard reaction, which adds a rich, complex flavor base that boiling or braising alone cannot achieve. If the sauce looks too thin after cooking, remove the lid and simmer on medium for the last 10 minutes to reduce it.
Keep the texture right: technique for even results
The heavy lid and thick walls of an enameled cast iron Dutch oven create a unique cooking environment. Unlike thin stainless steel, this cookware holds heat with significant momentum. That retention is powerful, but it demands discipline. If you treat it like a regular pot, you risk burning the bottom or leaving the center cold. The goal is to manage that thermal mass so every bite of your stew, braise, or bread is consistent.
Start by getting your heat source right. Cast iron responds slowly to temperature changes. If you crank the burner to high, the enamel can crack, and the food will scorch before it cooks through. Use medium-low to medium heat for almost everything. If you are searing meat, start with a hot pan, but once you add liquid or vegetables, drop the heat immediately. Let the Dutch oven do the work of distributing that heat evenly.
The lid is just as important as the pot itself. A tight-fitting lid traps steam, which keeps meats tender and prevents sauces from reducing too quickly. If your sauce looks watery after an hour, it’s likely because the lid isn’t sealing well, or the heat is too high, causing rapid evaporation that breaks the emulsion. If it’s dry, the lid is too tight, or the heat is too low for the volume. Check the seal. If the lid wobbles, add a clean kitchen towel under it during the first few minutes to help it seat properly.
Finally, resist the urge to stir constantly. The enamel surface is smooth, but it still benefits from patience. Let sauces simmer undisturbed for at least ten minutes before stirring. This allows the bottom layer to caramelize slightly without sticking, creating a deeper flavor profile. When you do stir, use a wooden spoon to protect the enamel. Gentle folding motions preserve the texture of vegetables and meat, ensuring they don’t break down into mush.
Swaps that still work
You can stretch a rich stew or braise without losing the deep, savory foundation that makes enameled cast iron shines. These substitutions keep the cooking process tight and the flavor profile consistent, even if you are out of a specific ingredient.
| Original Ingredient | Swap | Why It Works |
|---|---|---|
| Red Wine | Beef Broth + Balsamic Vinegar | Adds acidity and depth without alcohol. |
| Heavy Cream | Full-Fat Coconut Milk | Provides richness and creaminess for dairy-free versions. |
| Butter | Olive Oil or Ghee | Higher smoke point for better searing. |
| White Wine | Apple Cider Vinegar + Water | Mimics the tang needed to deglaze the pot. |
| Fresh Herbs (Thyme/Rosemary) | Dried Herbs (1/3 tsp per 1 tsp fresh) | Dried herbs hold up better to long, slow cooking times. |
Serve and store it
Enameled cast iron is a workhorse for both the table and the pantry. Because the enamel coating doesn’t react with acidic ingredients like tomato sauce or wine, you can cook and serve directly from the pot without worrying about metallic tastes or staining your dishware. The heavy lid locks in moisture, meaning stews and braises often taste better the next day as the flavors meld.
Cooling and refrigeration
Never place a hot Dutch oven directly into the refrigerator. The sudden temperature shock can crack the enamel or warp the cast iron. Let the pot cool to room temperature on a trivet or heat-proof mat first. Once cool, you can store leftovers in the same pot if you’re short on containers, or transfer the food to airtight glass or plastic containers. The enamel interior won’t absorb odors, so your next meal won’t taste like yesterday’s beef bourguignon.
Reheating leftovers
Reheating is where enameled cast iron shines. Unlike thin metal pans, it holds heat evenly, preventing scorching. For best results, add a splash of water or broth to the bottom of the pot to create steam and loosen any stuck bits. Cover with the lid and warm over low to medium-low heat, stirring occasionally. This gentle approach keeps meats tender and prevents the sauce from separating or drying out.
Long-term storage
If storing for more than a day, ensure the food is completely cooled and the lid is sealed. If you leave the lid slightly ajar, moisture escapes and food dries out. For long-term storage, consider using a piece of parchment paper between the pot and lid to prevent any potential sticking if sauces caramelize against the enamel. Always store in a dry place to prevent rust on the exterior if the enamel chips.
Dutch oven: what to check next
Enameled cast iron is a long-term investment in your kitchen. It performs well but requires specific care to maintain its finish and cooking performance. Here are the practical answers to the questions that come up most often.
No comments yet. Be the first to share your thoughts!